

Activation Guide
In order to continue using your Dr Migrate licence once you have selected a paid licence type, you will need to complete the activation process. This means linking your Dr Migrate license with your Azure subscription via the Azure Marketplace, Dr Migrate - SaaS Tenant Link plan.
Activation is required in any of the following instances: - If you have selected a paid licence type as your Next Licence during a trial licence period. - If you have purchased a paid SaaS licence.
Note: An Azure subscription is required to complete this process.
What if I'm on a Trial licence?
- You won’t be charged during the trial period. Your licence will be automatically canceled at the end of the trial period unless you select one of the paid plans on the "Manage Licence" page.
- Canceled licences will be permanently deleted 30 days from the trial licence expiry date. Selecting a paid licence, such as Hibernate, will mean your data and current progress is retained. You can select a paid licence as your Next Licence anytime during the trial period, or within the 30 day expiry window.
Moving to a paid licence:
- Your progress is saved – Everything you’ve discovered and planned stays intact, so there’s no need to start over later.
- You stay migration-ready – Hibernation ensures your environment is preserved and ready when you are.
- Billing stays simple – Any future licence fees are added to your existing Azure Marketplace invoice, with no extra steps.
If you purchased Dr Migrate through a partner, billing will be handled by the partner (not Microsoft) unless otherwise agreed. Refer to your License Information page for estimated license fees and review our terms and conditions ↗ for more details.
Start Activation
Access Dr Migrate Portal
Navigate to Dr Migrate Portal ↗ and log in with your Microsoft credentials.
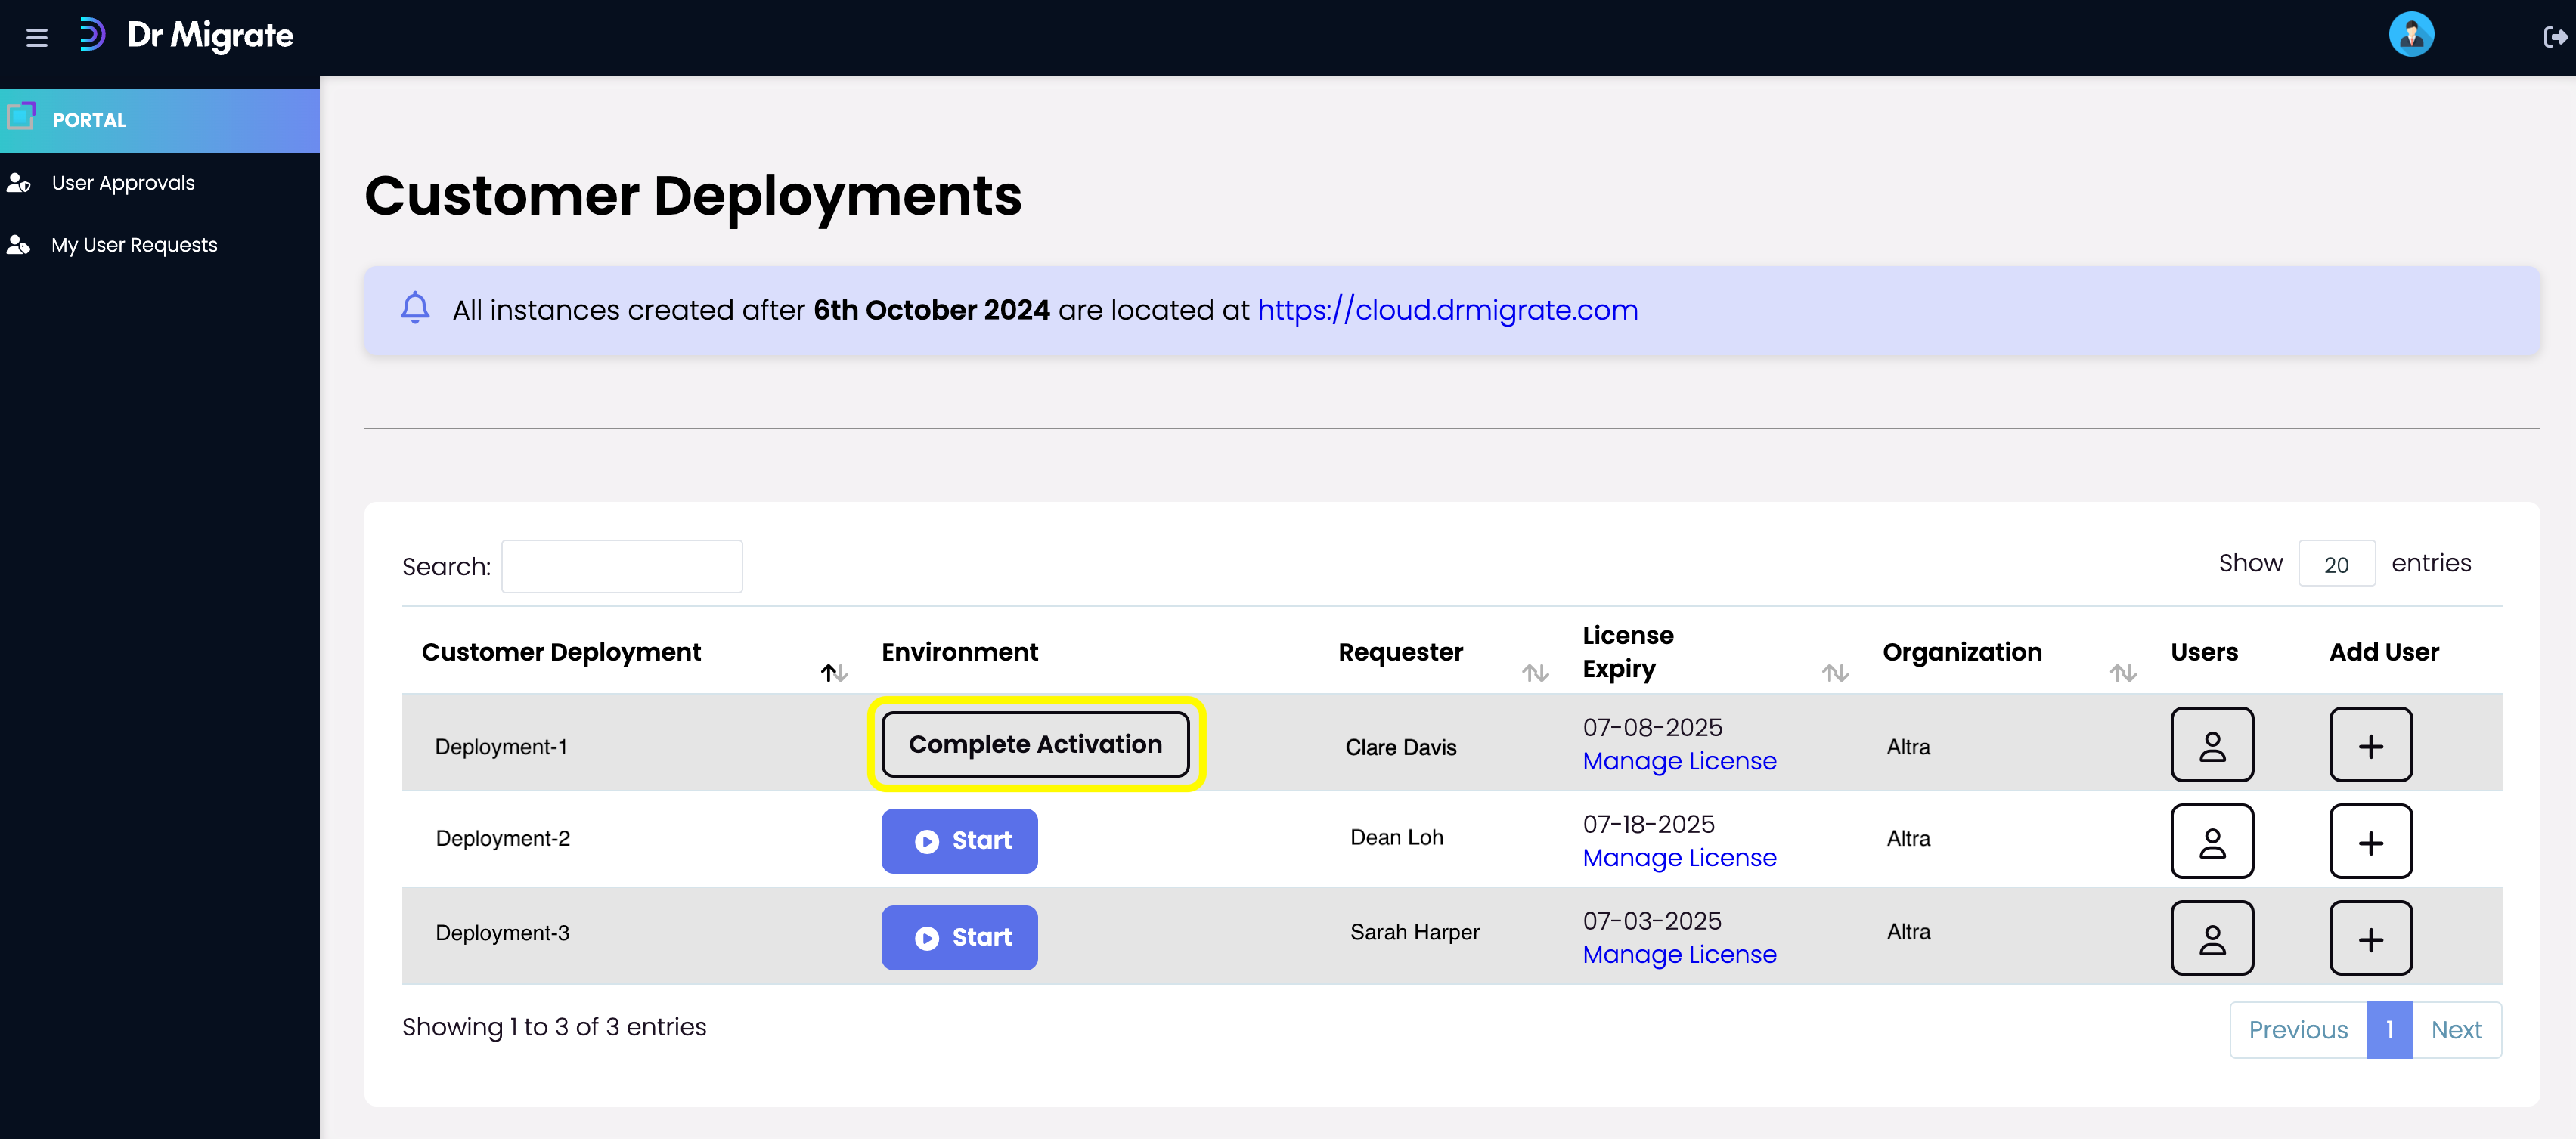
Click "Continue"
A setup wizard appears. Click Subscribe to begin the Marketplace subscription process.
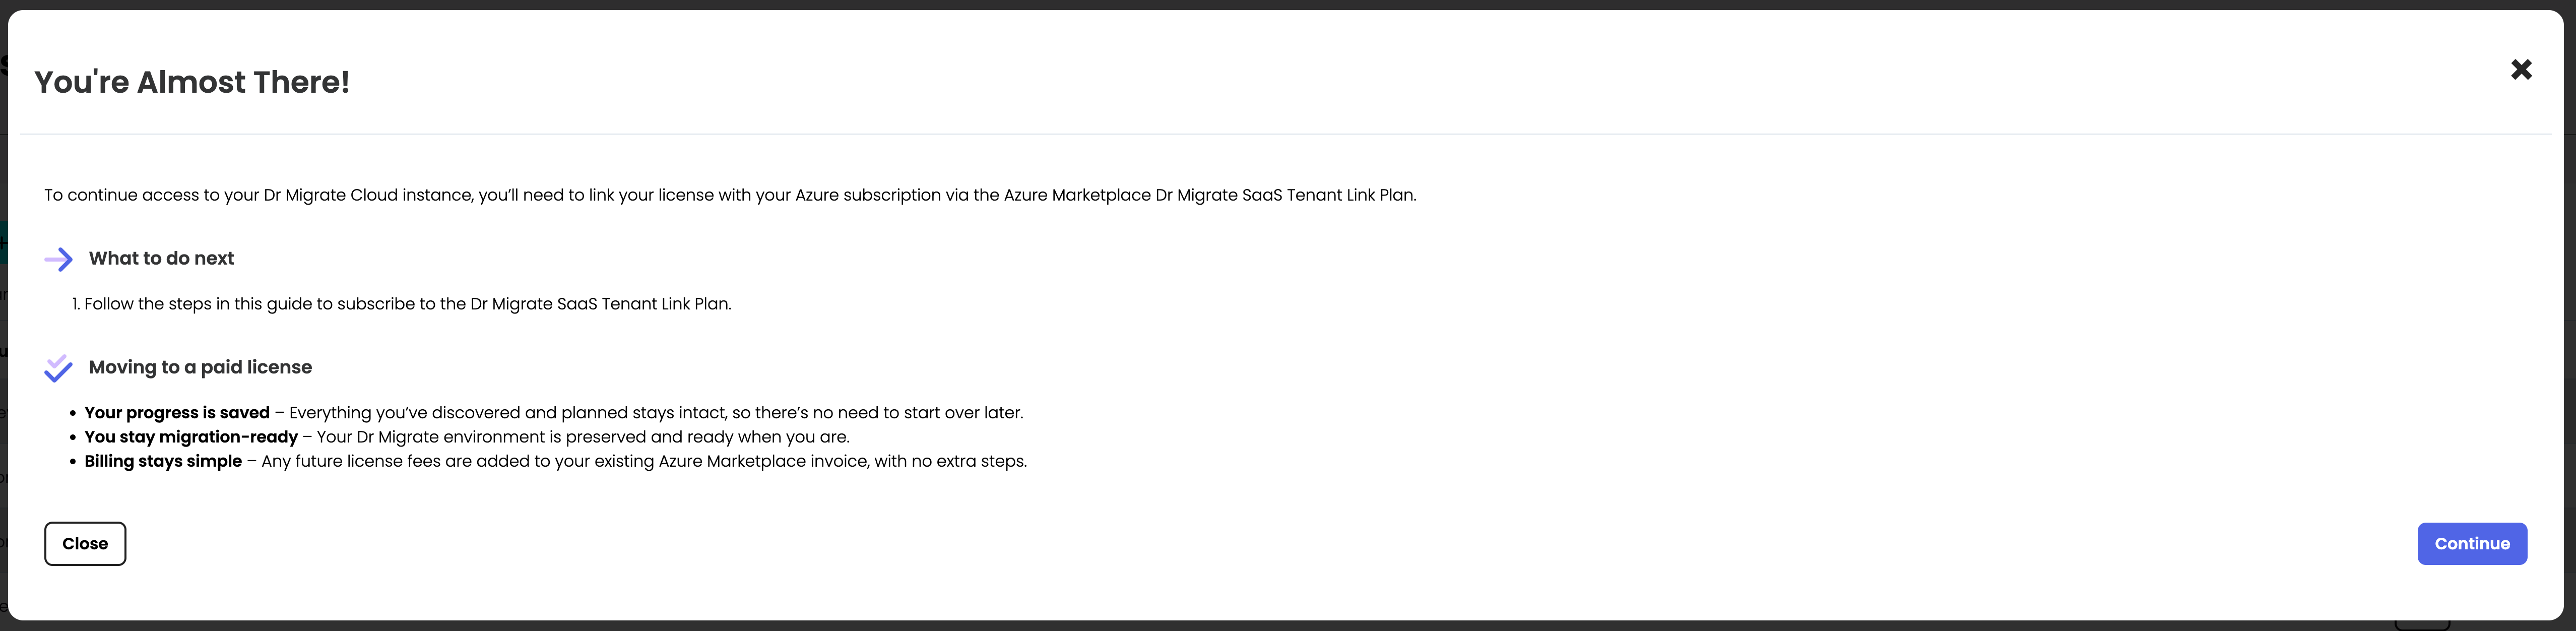
You must subscribe to the Dr Migrate plan on the Azure Marketplace before activation can continue. Follow the SaaS Plan Setup steps to complete this before proceeding.
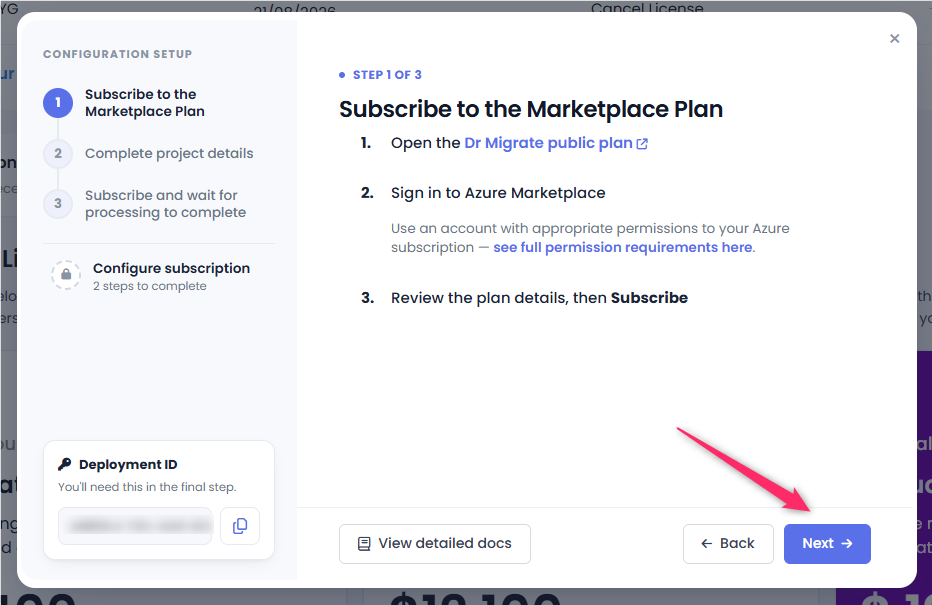
Complete Microsoft Authorization
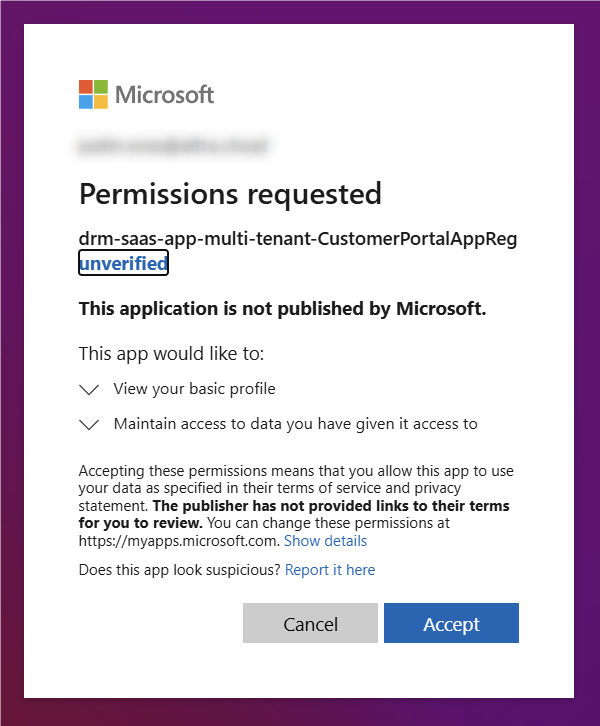
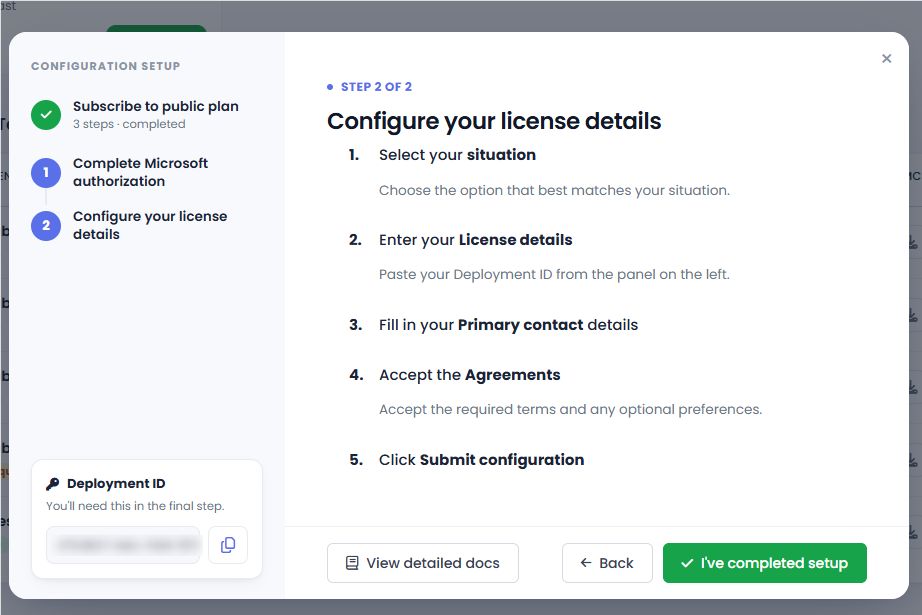
Once your Marketplace subscription is confirmed, a 2-step configuration wizard opens in the Dr Migrate Portal. In step 1, a Microsoft authorization prompt appears automatically. Review the permissions Dr Migrate is requesting and click Accept to continue.
Configure Your License Details
In step 2, enter your license details using the Deployment ID shown in the left panel, fill in your primary contact details, accept the agreements, and click Submit configuration.
Activation Complete
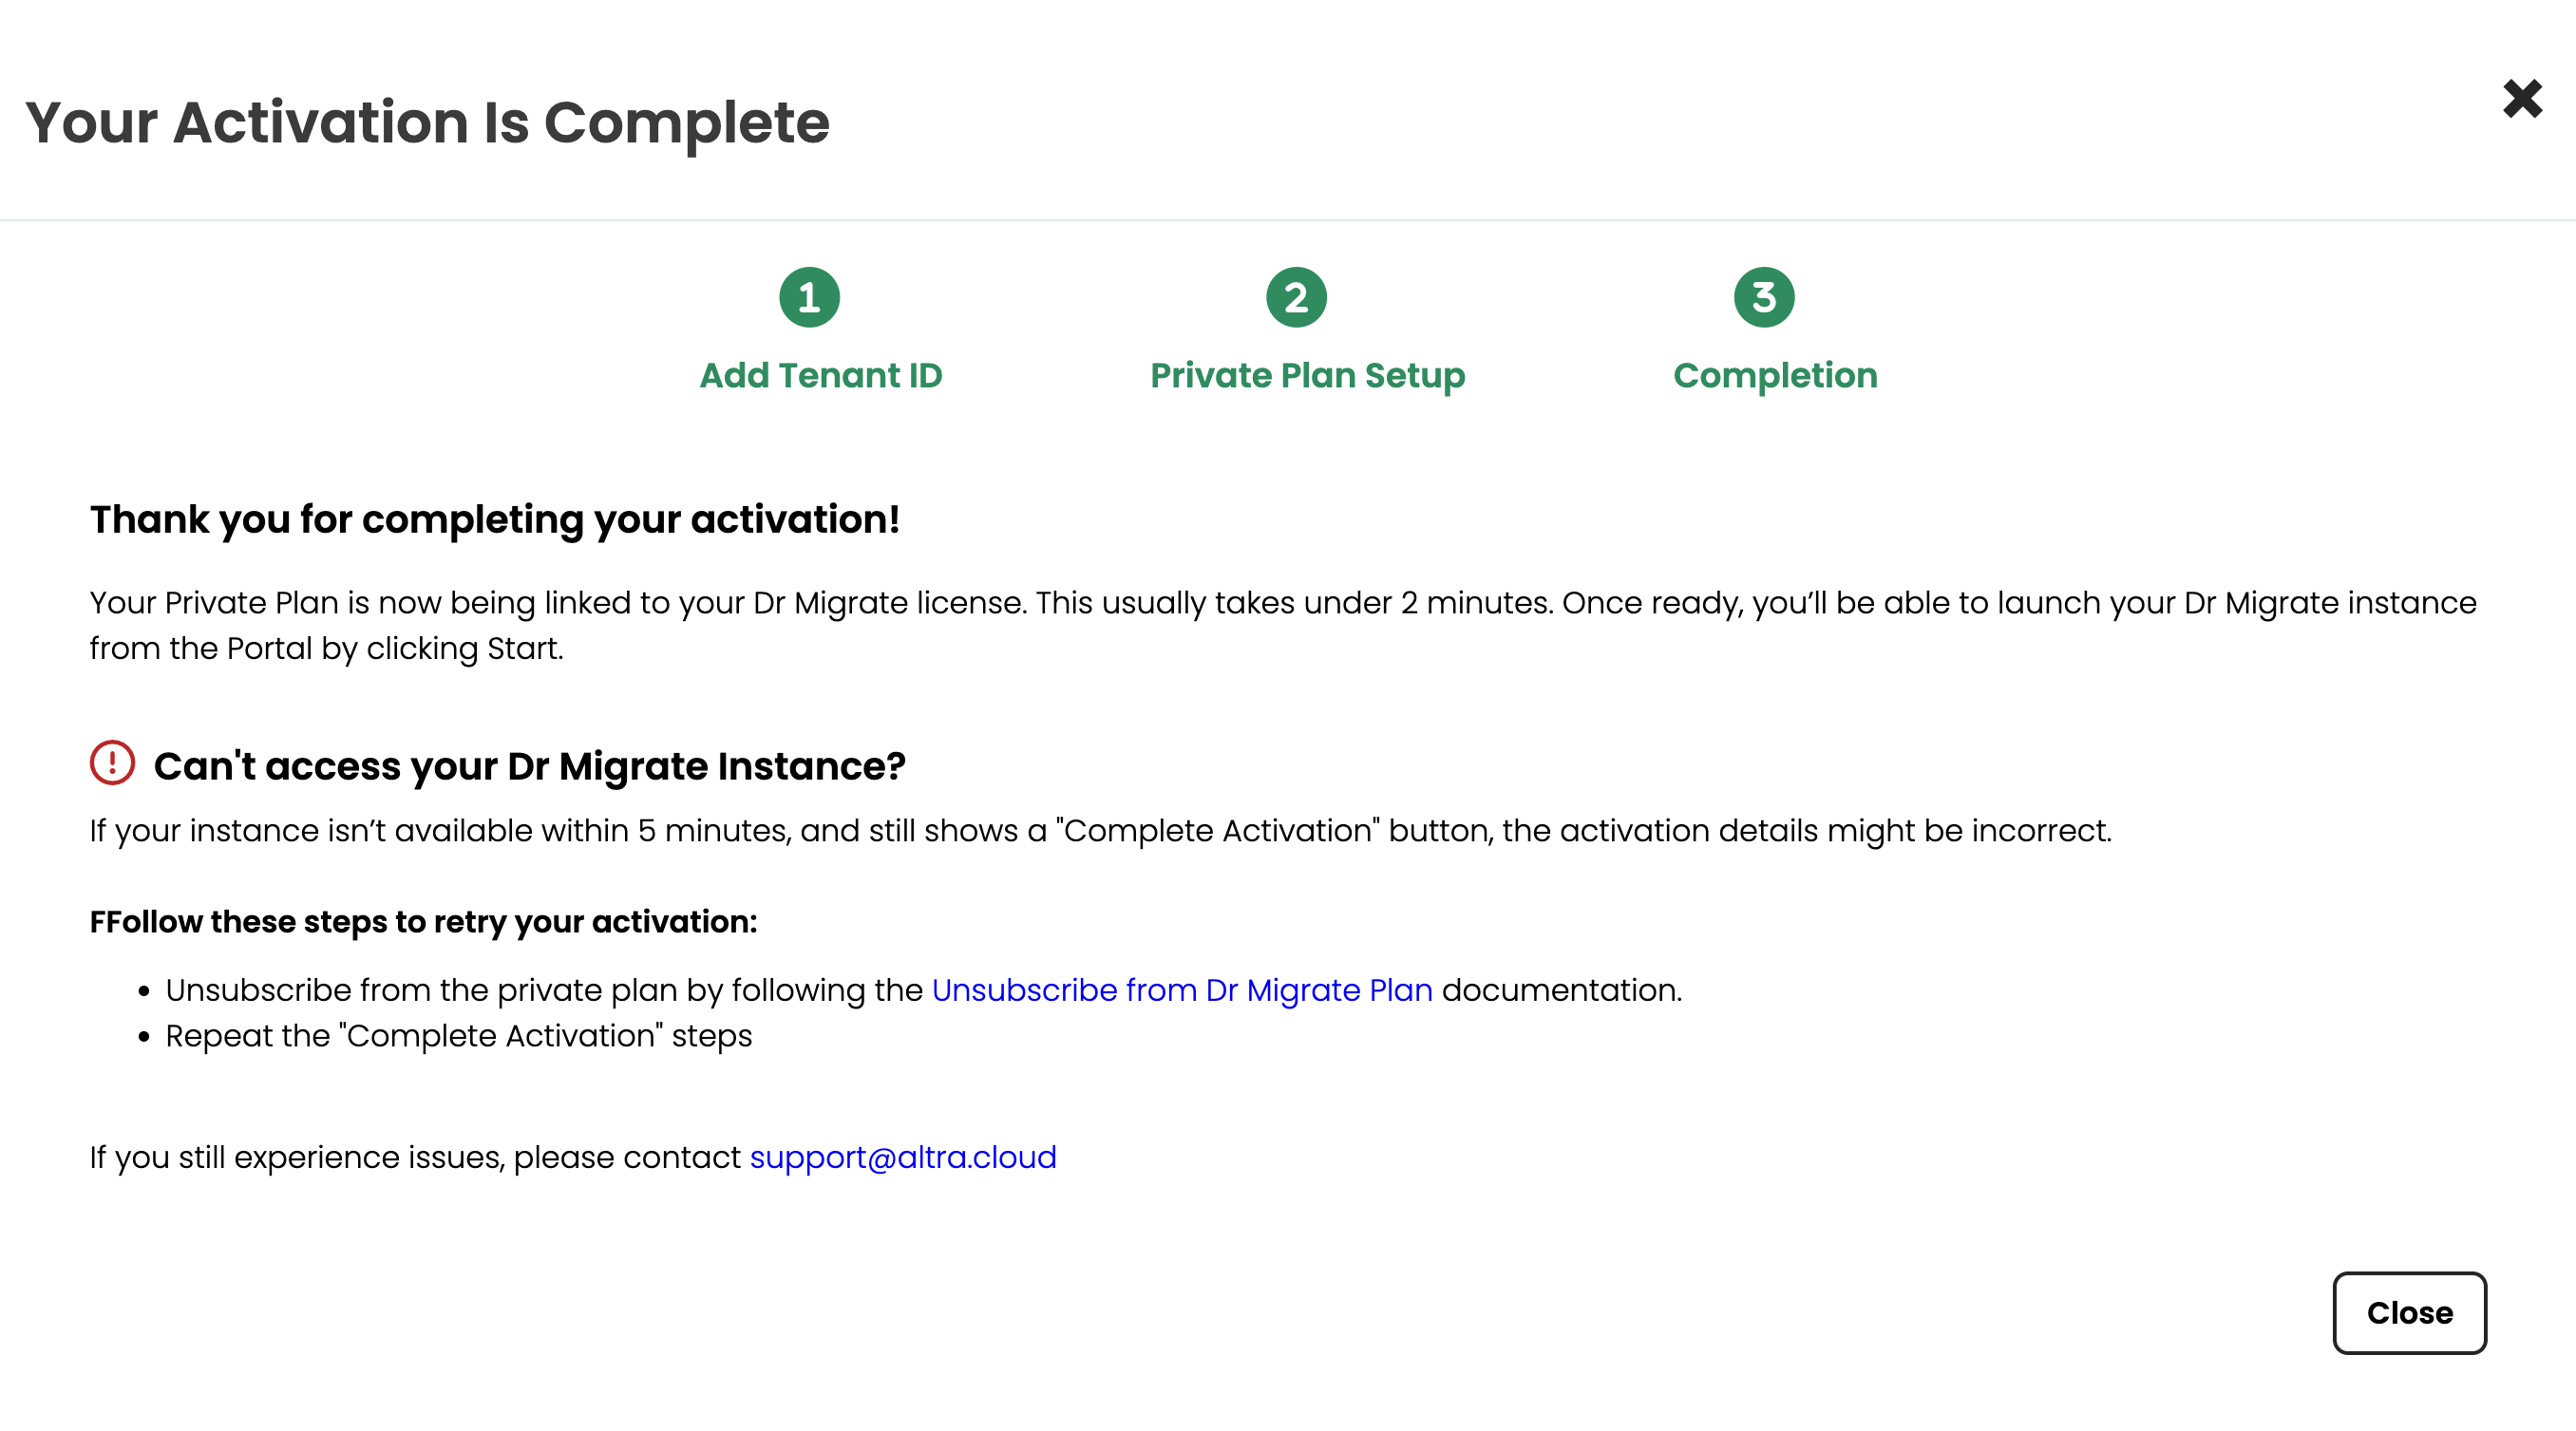
Once you've submitted your license configuration, a Complete screen confirms you've finished the activation steps. Click I've finished to close it.
Your activation is then processed, which can take up to 1 business day. You'll receive a confirmation email once your environment is ready. Until then, your tenant shows a Pending activation status in the Dr Migrate Portal instead of a Start button.
Start Dr Migrate Instance
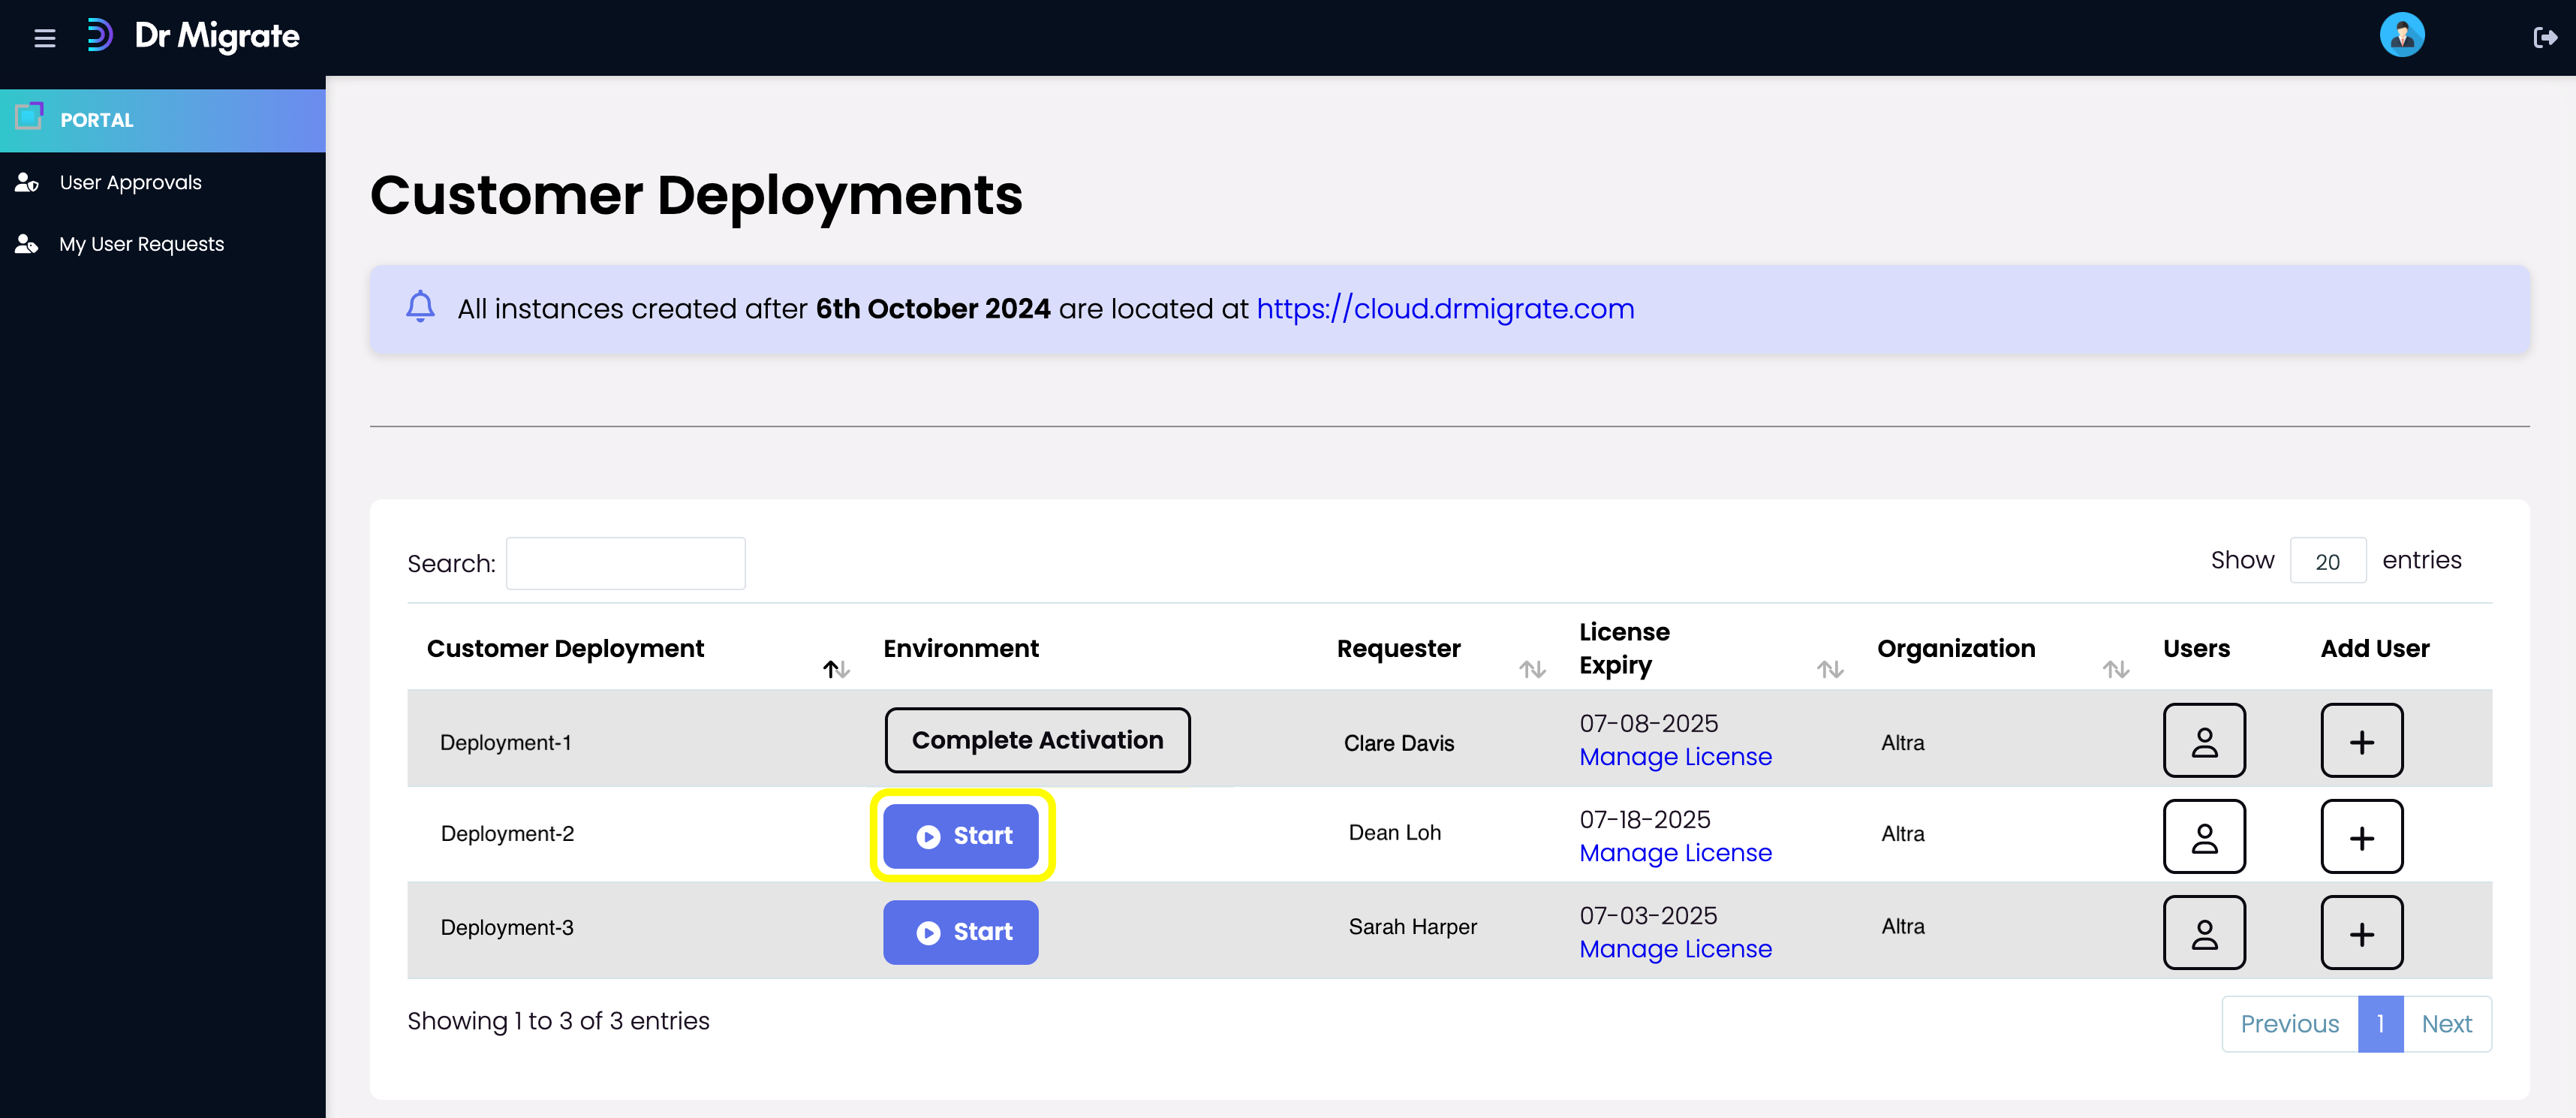
Once your activation has finished processing (up to 1 business day) and you've received the confirmation email, return to the Dr Migrate Portal. Your tenant's status will have changed from Pending activation, and a Start button will be available - click it to begin using Dr Migrate.
Unable to access your Dr Migrate Instance?
If your Dr Migrate instance still shows Pending activation more than 1 business day after completing the activation steps, the details entered may contain errors.
Note: Instances undergo regular maintenance every Sunday from 2AM to 10AM local time in the servers region. Your system may not be accessible during this time.
Steps to retry activation:
- Unsubscribe from your Marketplace plan by following the Unsubscribe from Dr Migrate SaaS Plan
- Repeat this work instruction.
Next Steps
Now you can continue with activation or data sync steps: