Applications
The Application dashboard allows you to view, information about the discovered application estate, and modify individual application records.
Configuration Steps
Access Applications Dashboard
You can access the Application dashboard from the Inventory Chevron
![]()
Select Application
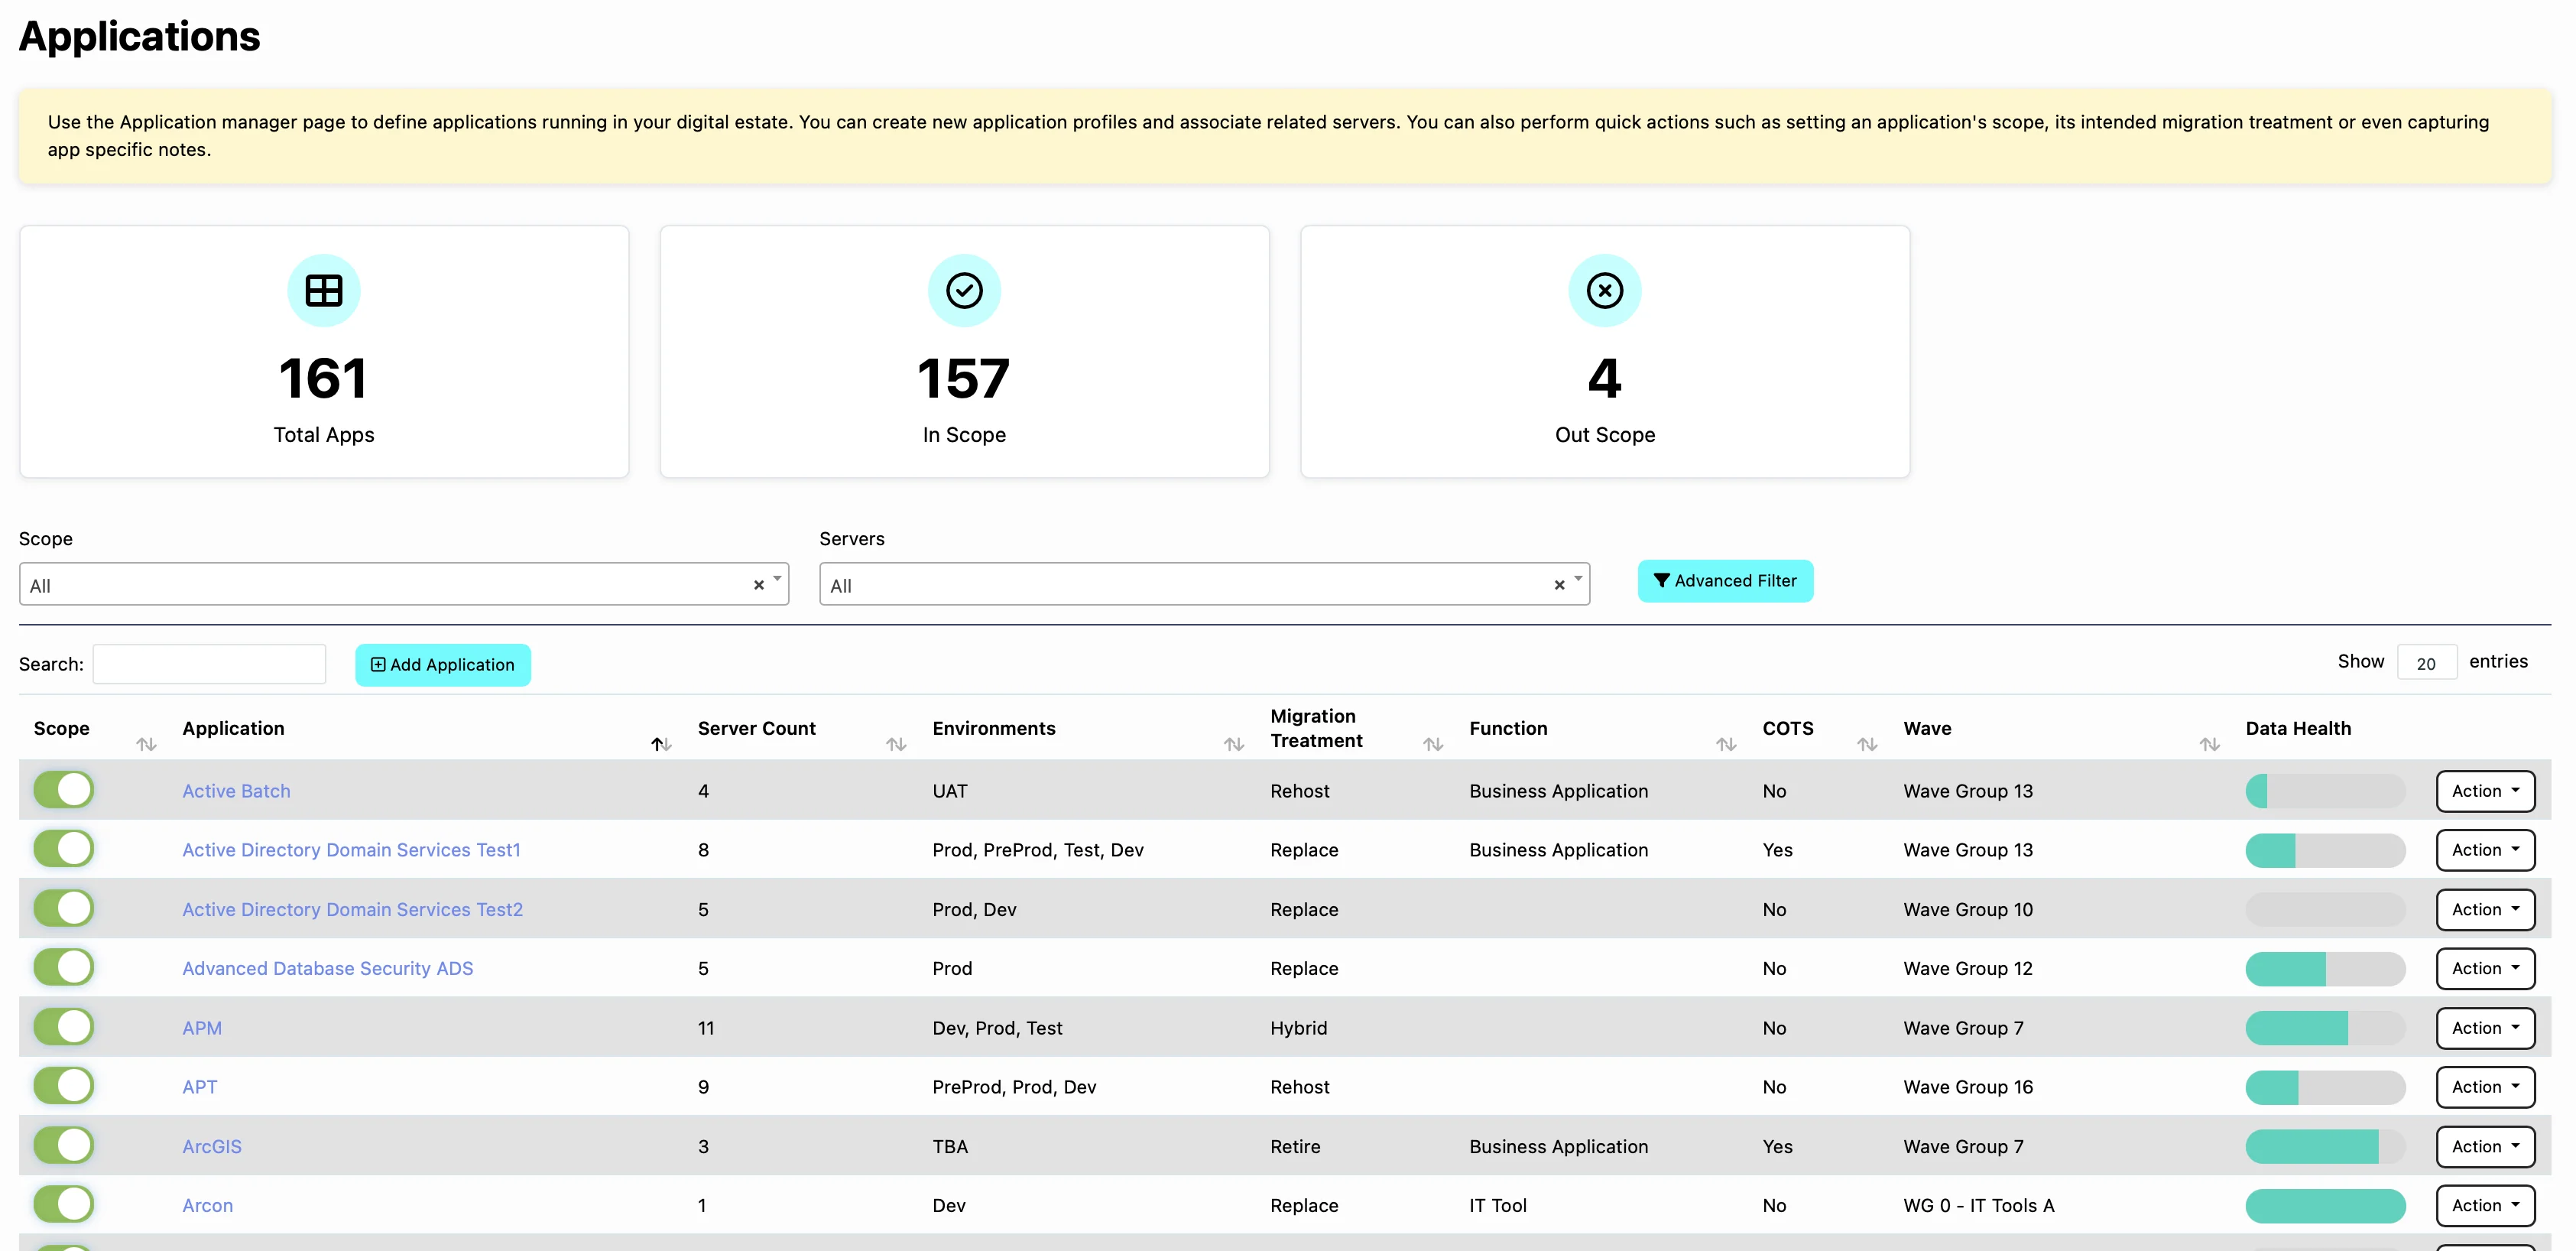
Simply click the application from the list of discovered applications. You will be presented with the Application Quick editor for that application.
Quick Editor Sections

The Application Quick Editor is split in to sections:
| Section | Description |
|---|---|
| Overview | Edit key sections of the application record, and assign Team Members |
| Environments | Define the Environment that the Application is a part of, and add new environments |
| Servers | Add and remove the servers in the application |
| App Sizing | See the complexity of the application, as determined by Application Complexity |
| Migration Treatment | Add Application Treatment, and Answer Application Treatment Questions (If available) |
| Tags | Add and remove tags to the application. |
| Notes | Record notes against the application record. |
Overview

Here you can set the scope of the application, add or update the application name, along with providing an application description. Migration Wave group assignment, can also be edited here.
Team Members and App Classification
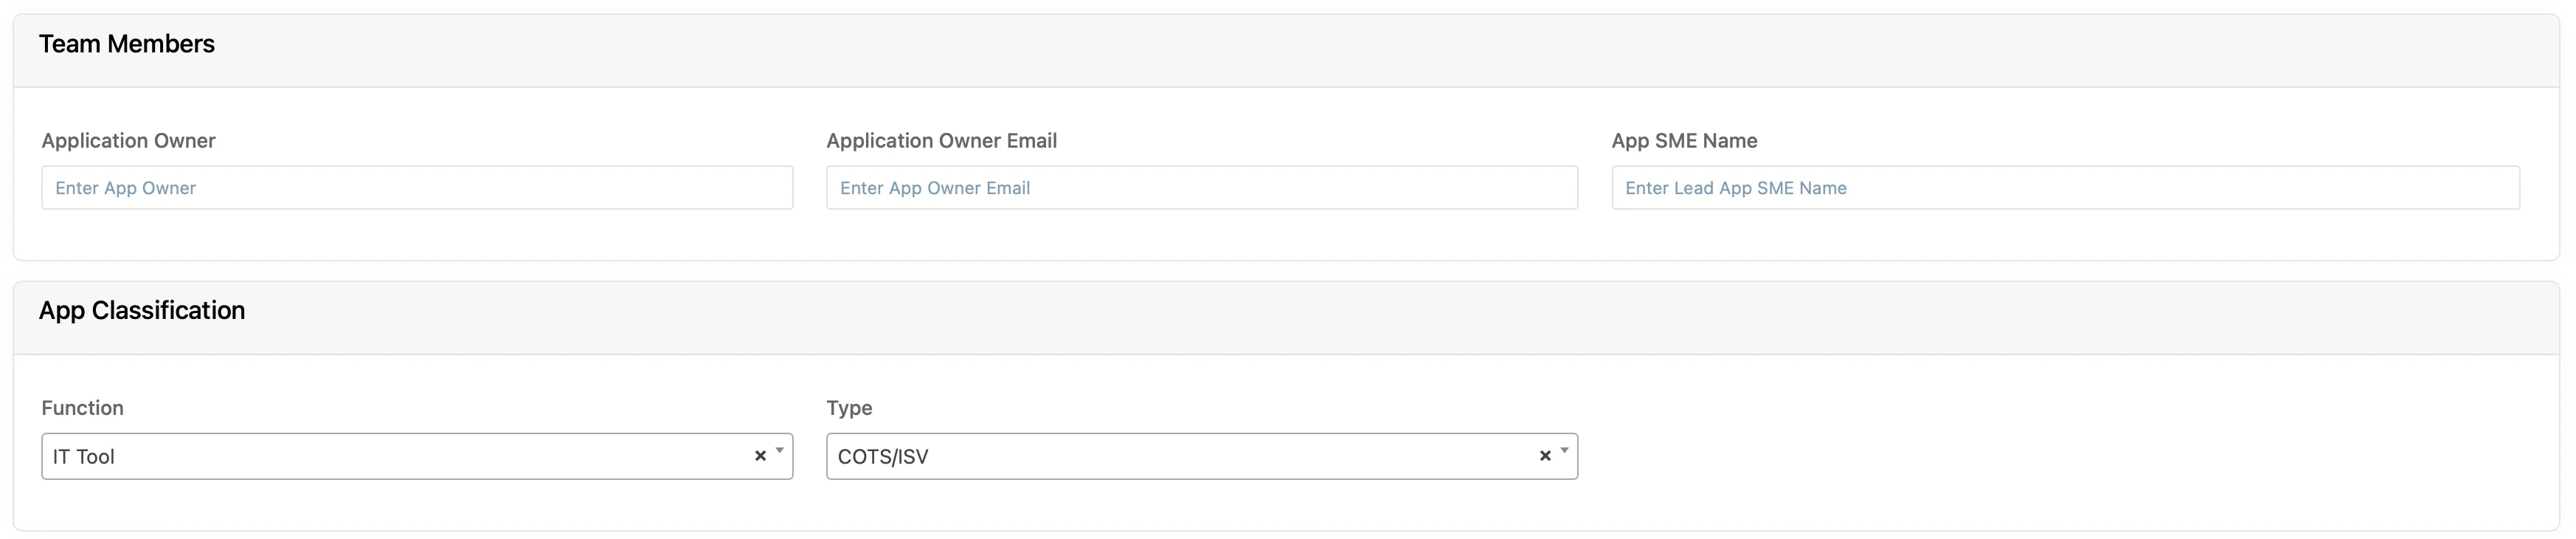
Team Members can be added, for the app’s Owners and SME’s. These items can be used as part of report delivery, and filtering.
App classification values for Function nad Type can be set here, these values are an important part of scoping and costing.
Data Classification and Hosting Requirements

Set the PII status of the application, and its business critically. You can also mark if the application needs High availability High Availability or Disaster Recovery to be consider Data classification
Environment
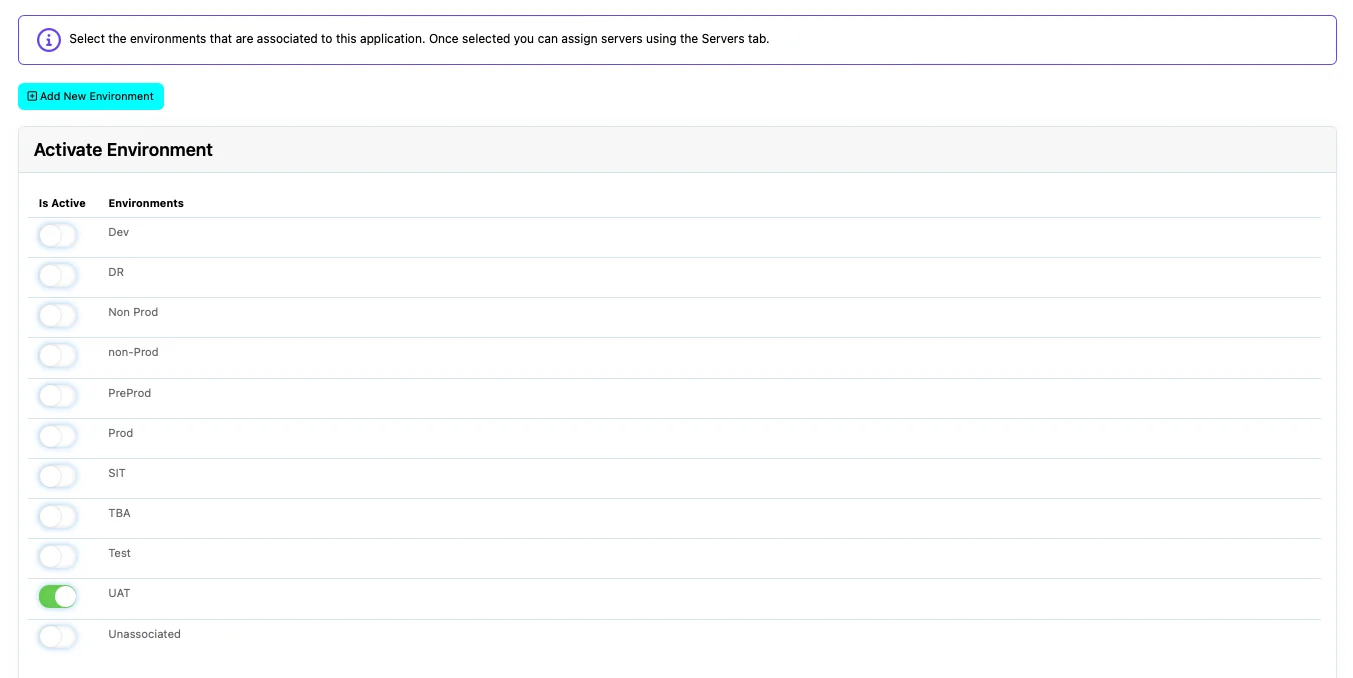
Here you can assign an environment to your application. Environments are determined from what is selected in the [Inventory Upload][L1] step, they can also be added by using the Add New Environment
Adding a New Environment
Click Add New Environment
Populate your environment details, making sure to check active.
Once saved the new environment will be available in the list
Servers
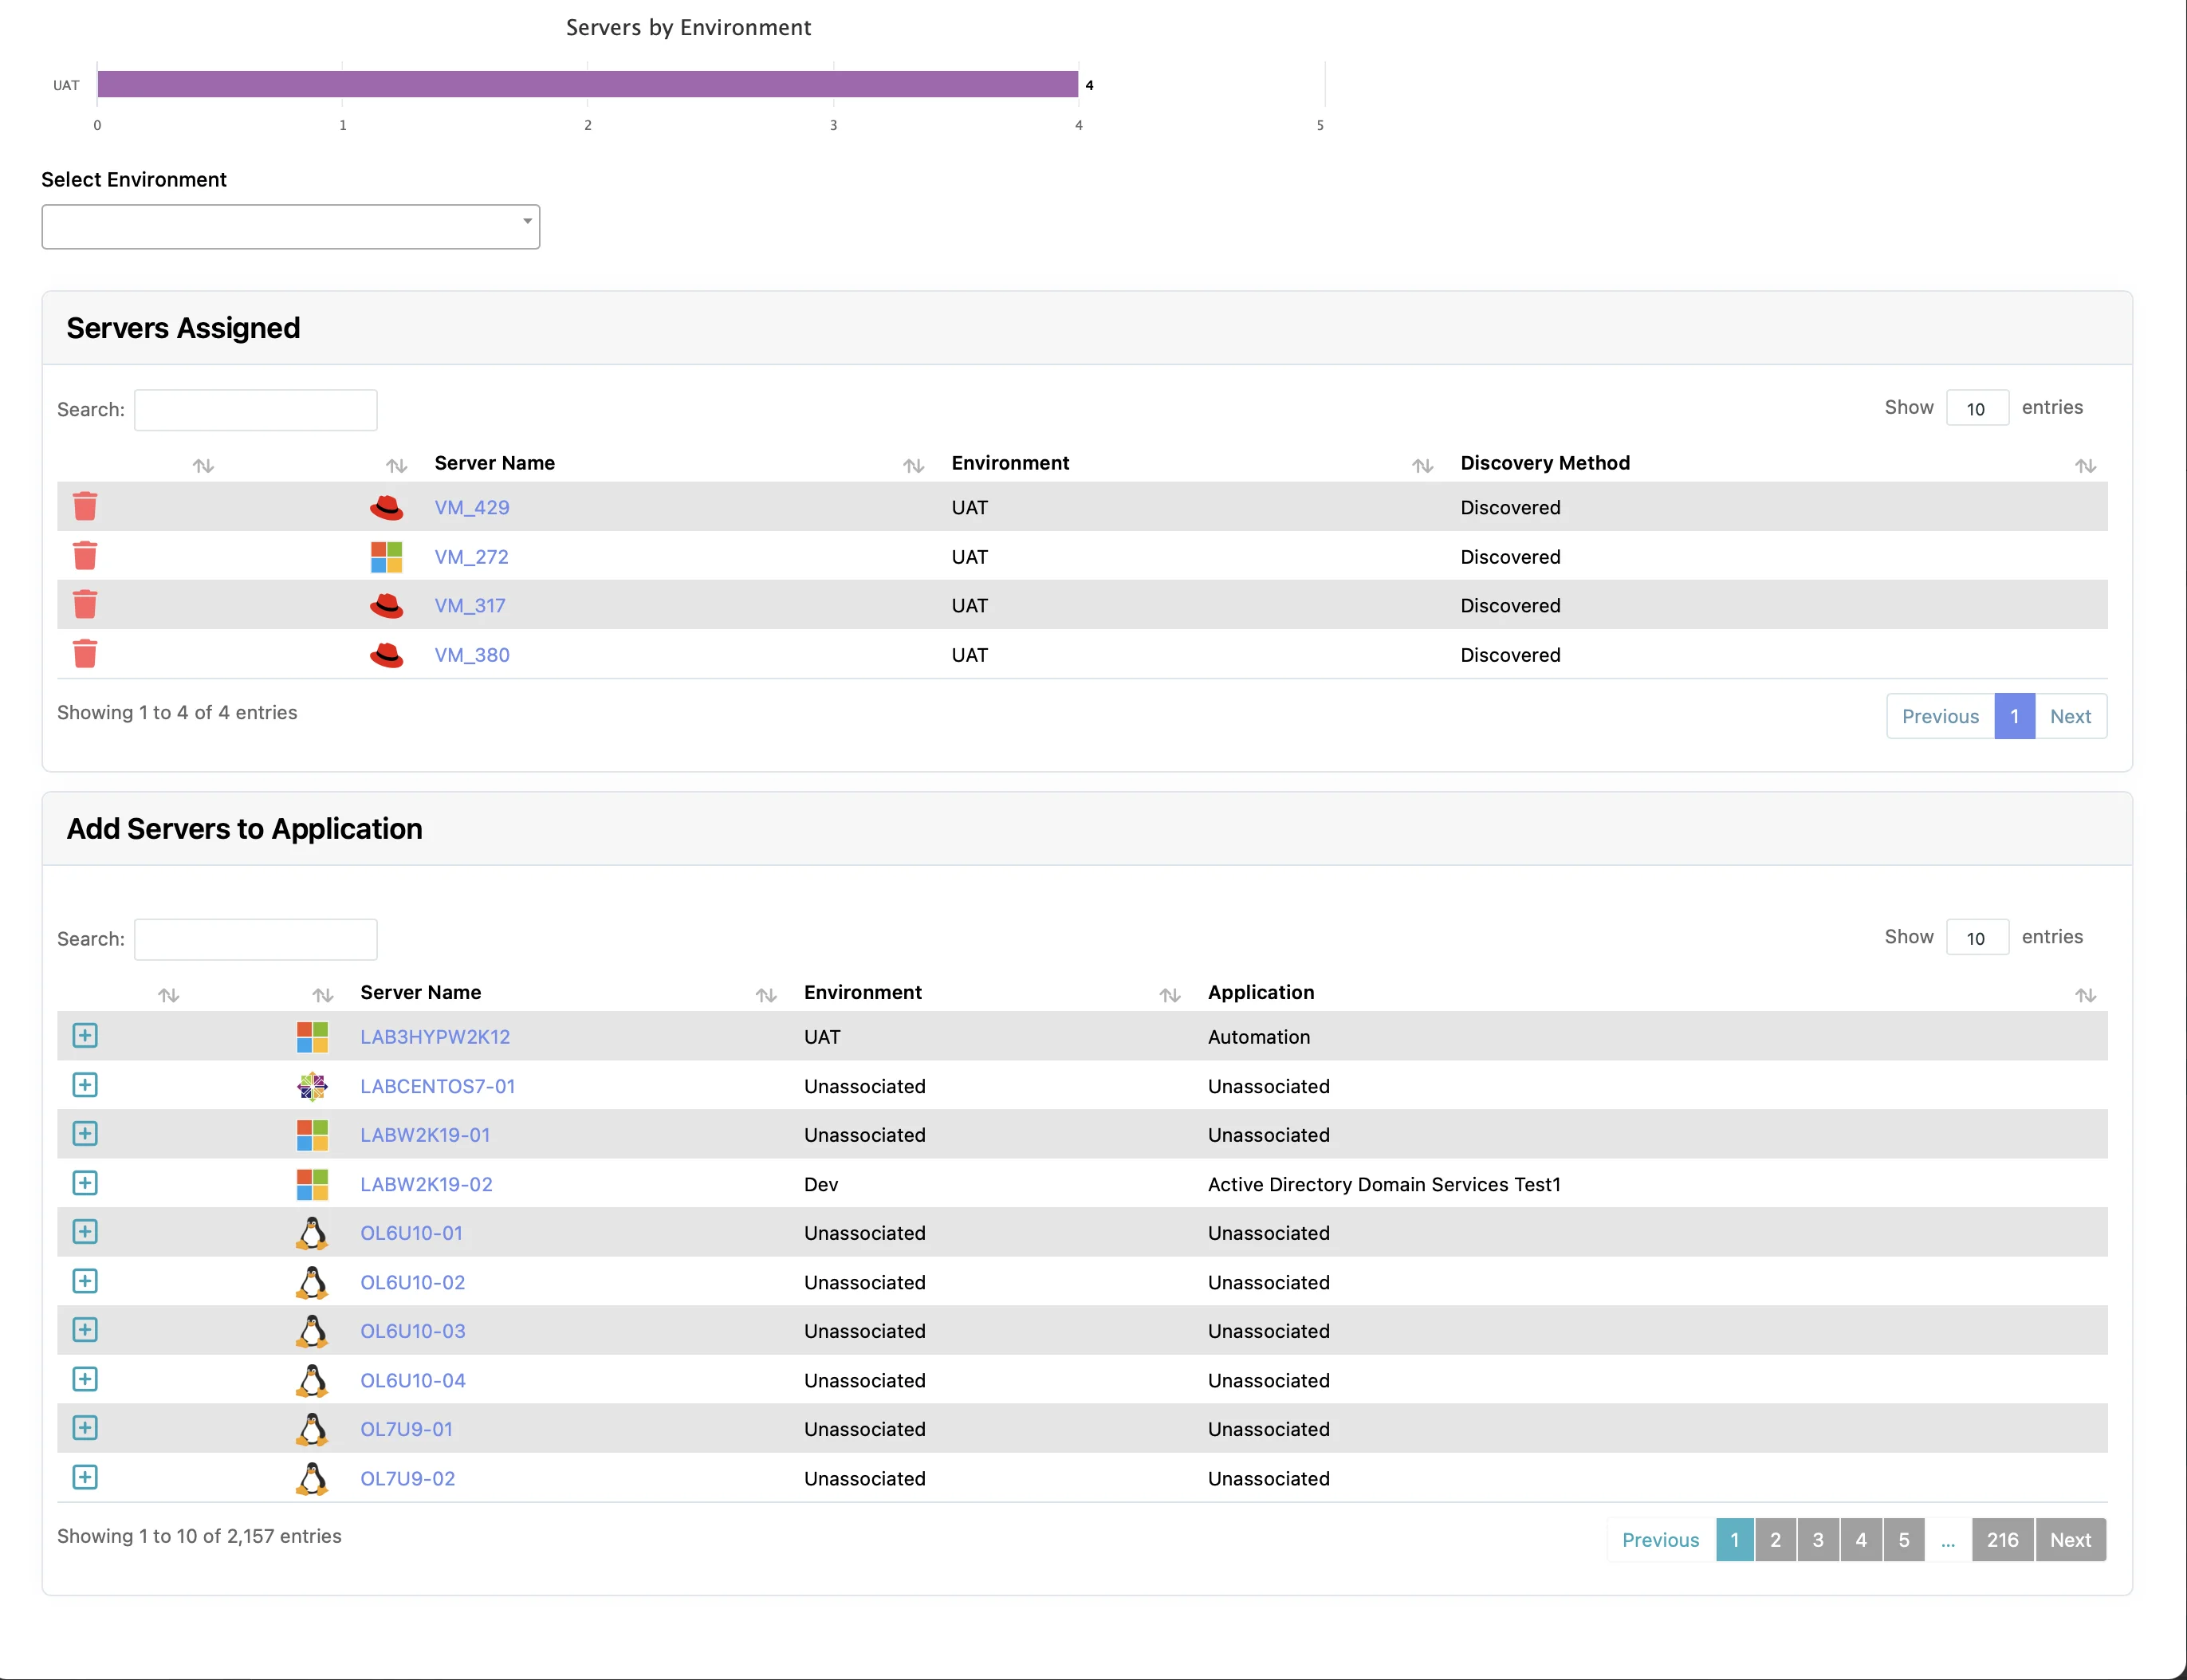
From this screen you are able to add and remove servers from an application.
App Sizing
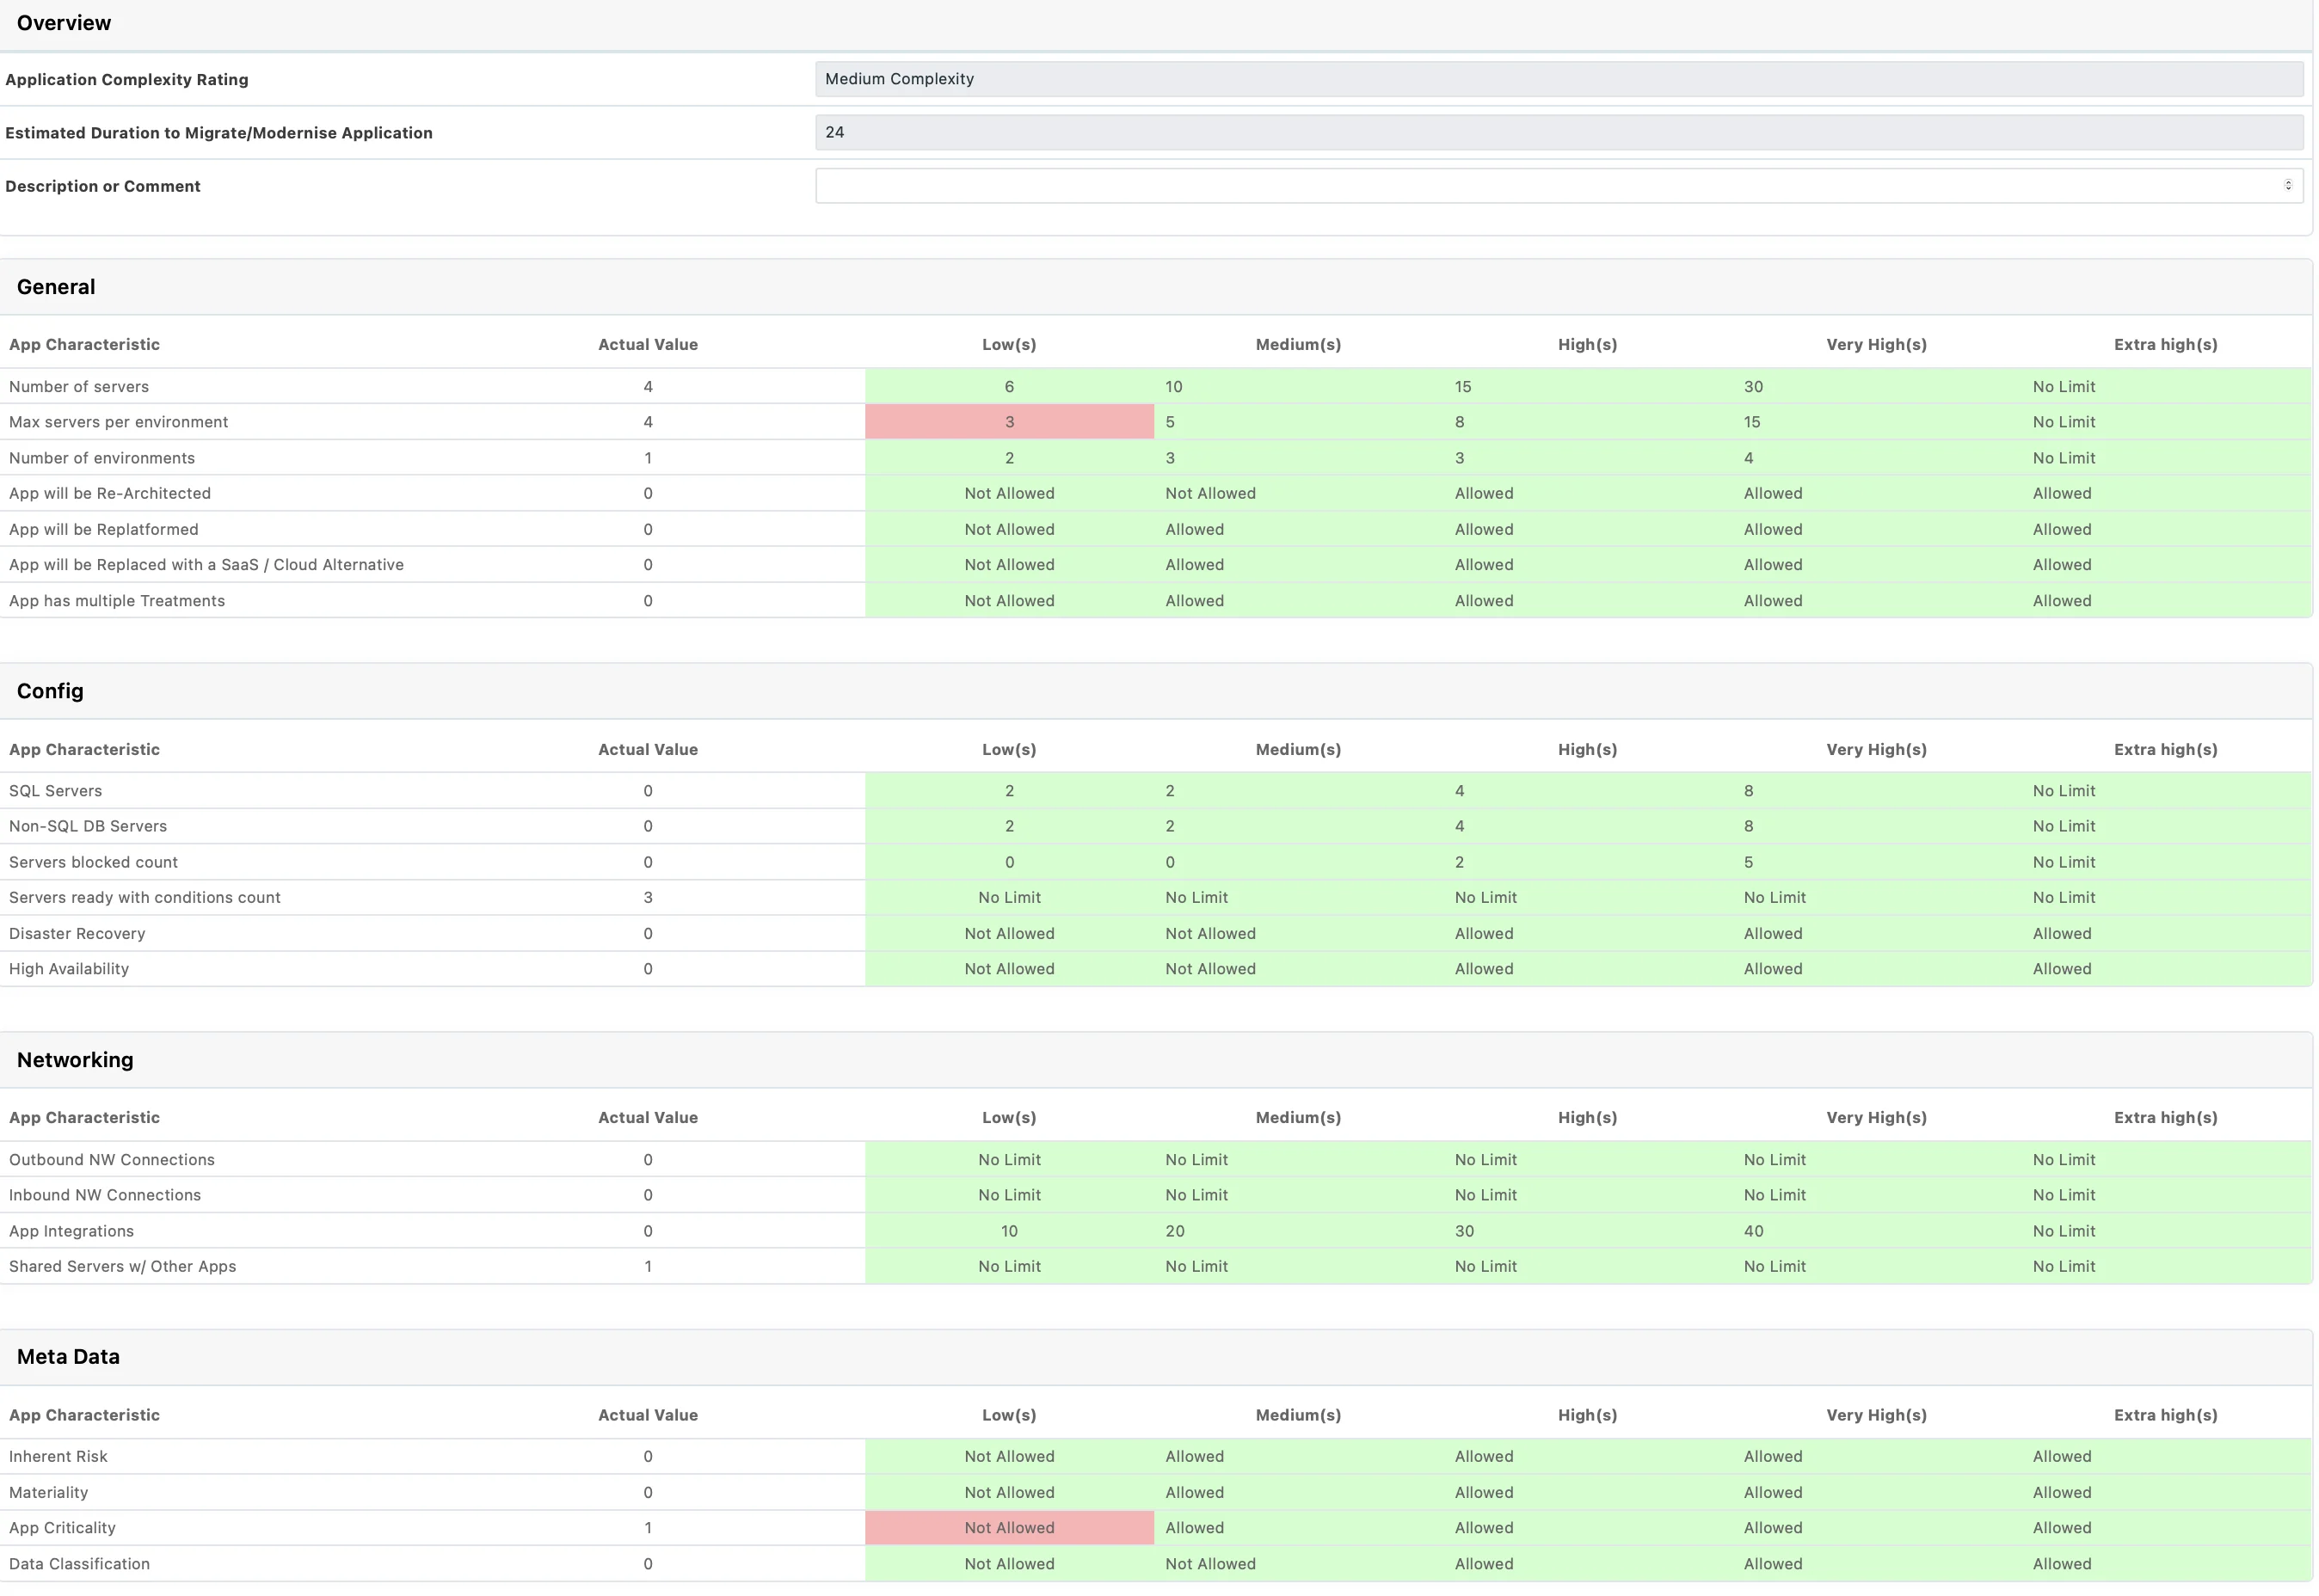
Here you can view the Application Complexity for the chosen application.
Migration Treatment
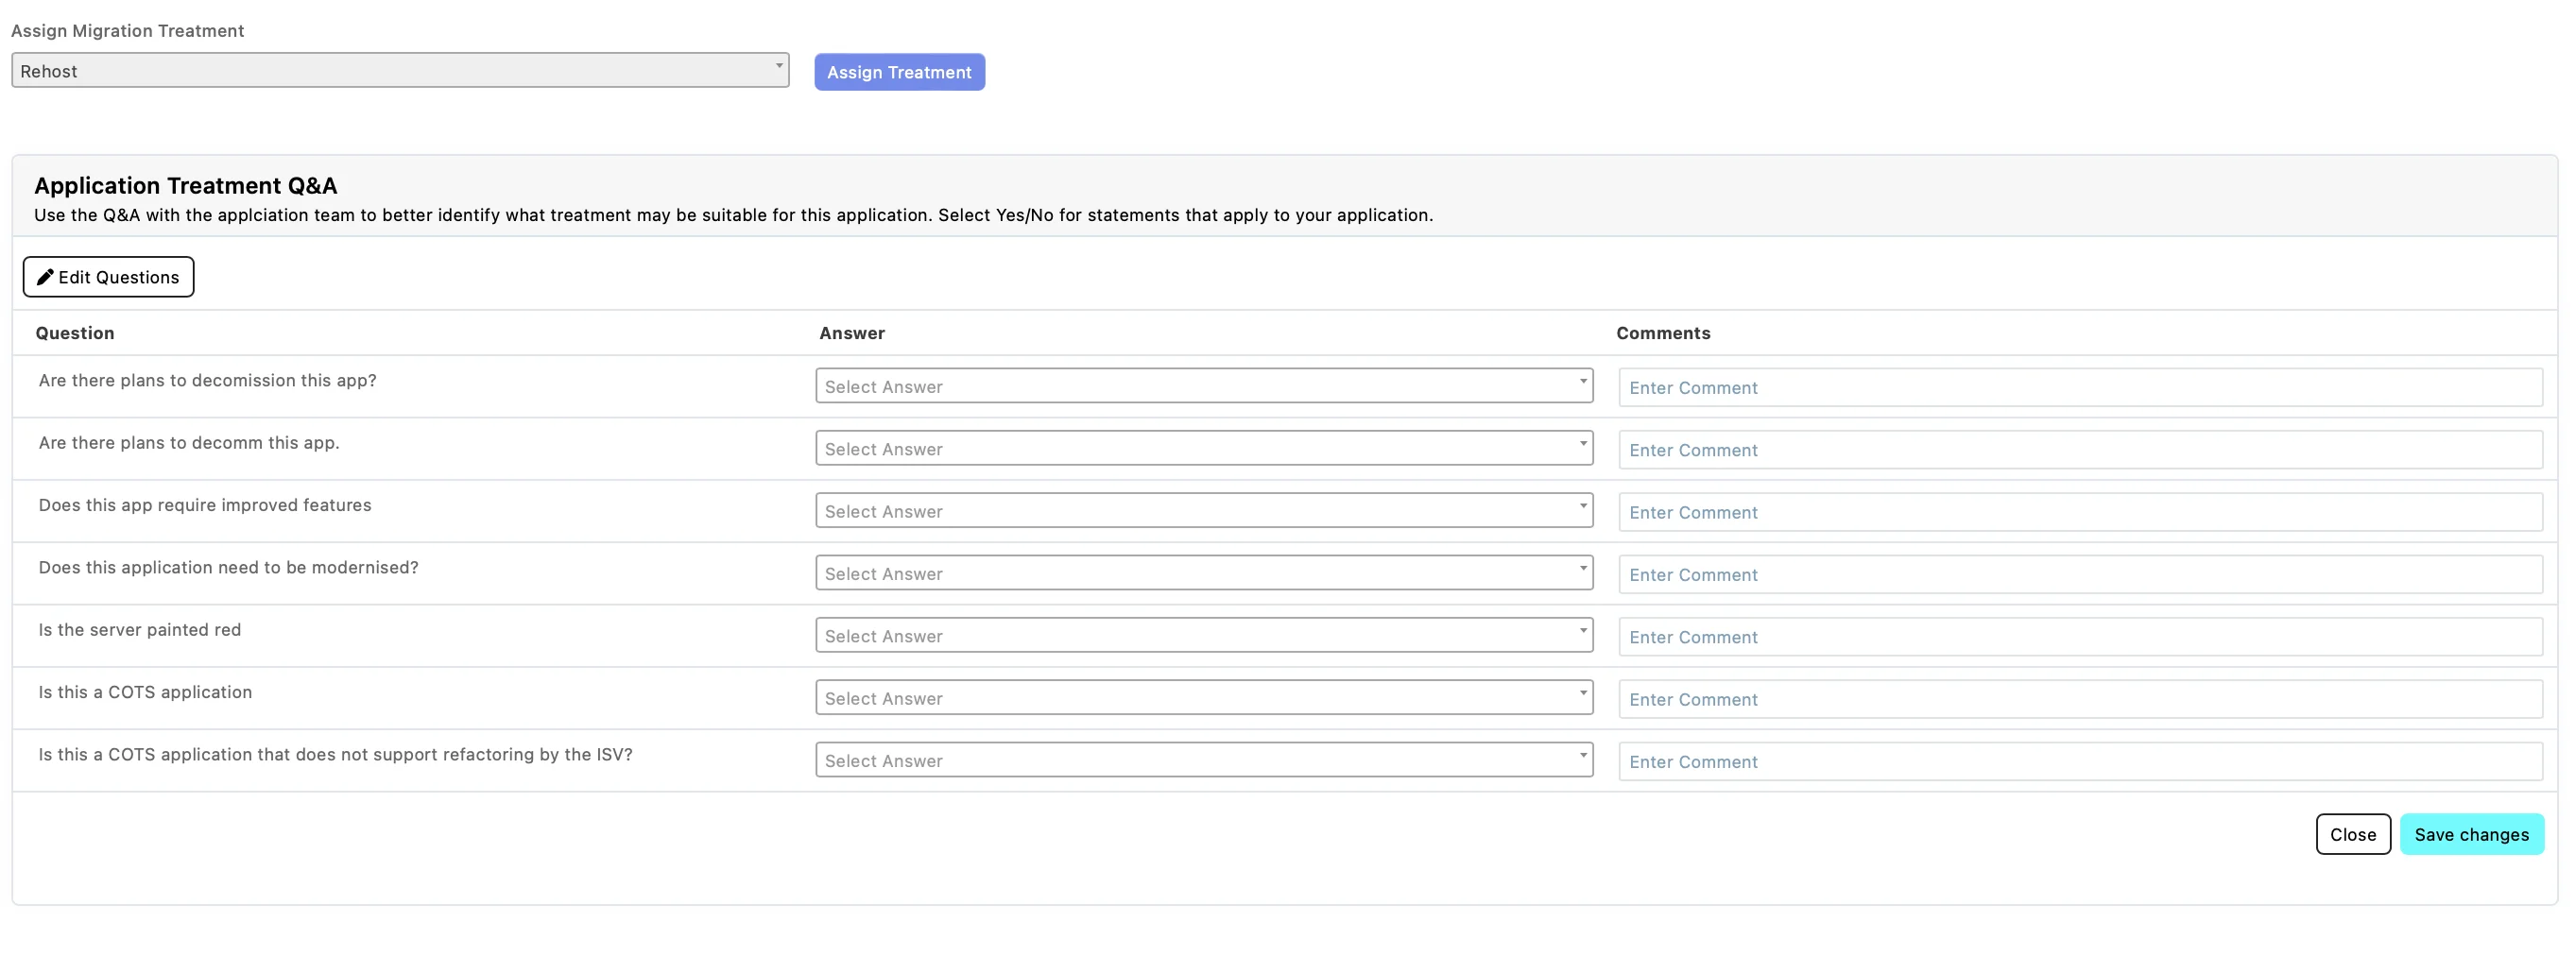
Here you can view the currently assigned migration treatment, and answer any applicable treatment questions (if assigned).
Tags

Here you can add tags to your application. Tags are Key Value Pairs.
Adding Tags
Tags can be added by clicking Add Tag

Notes
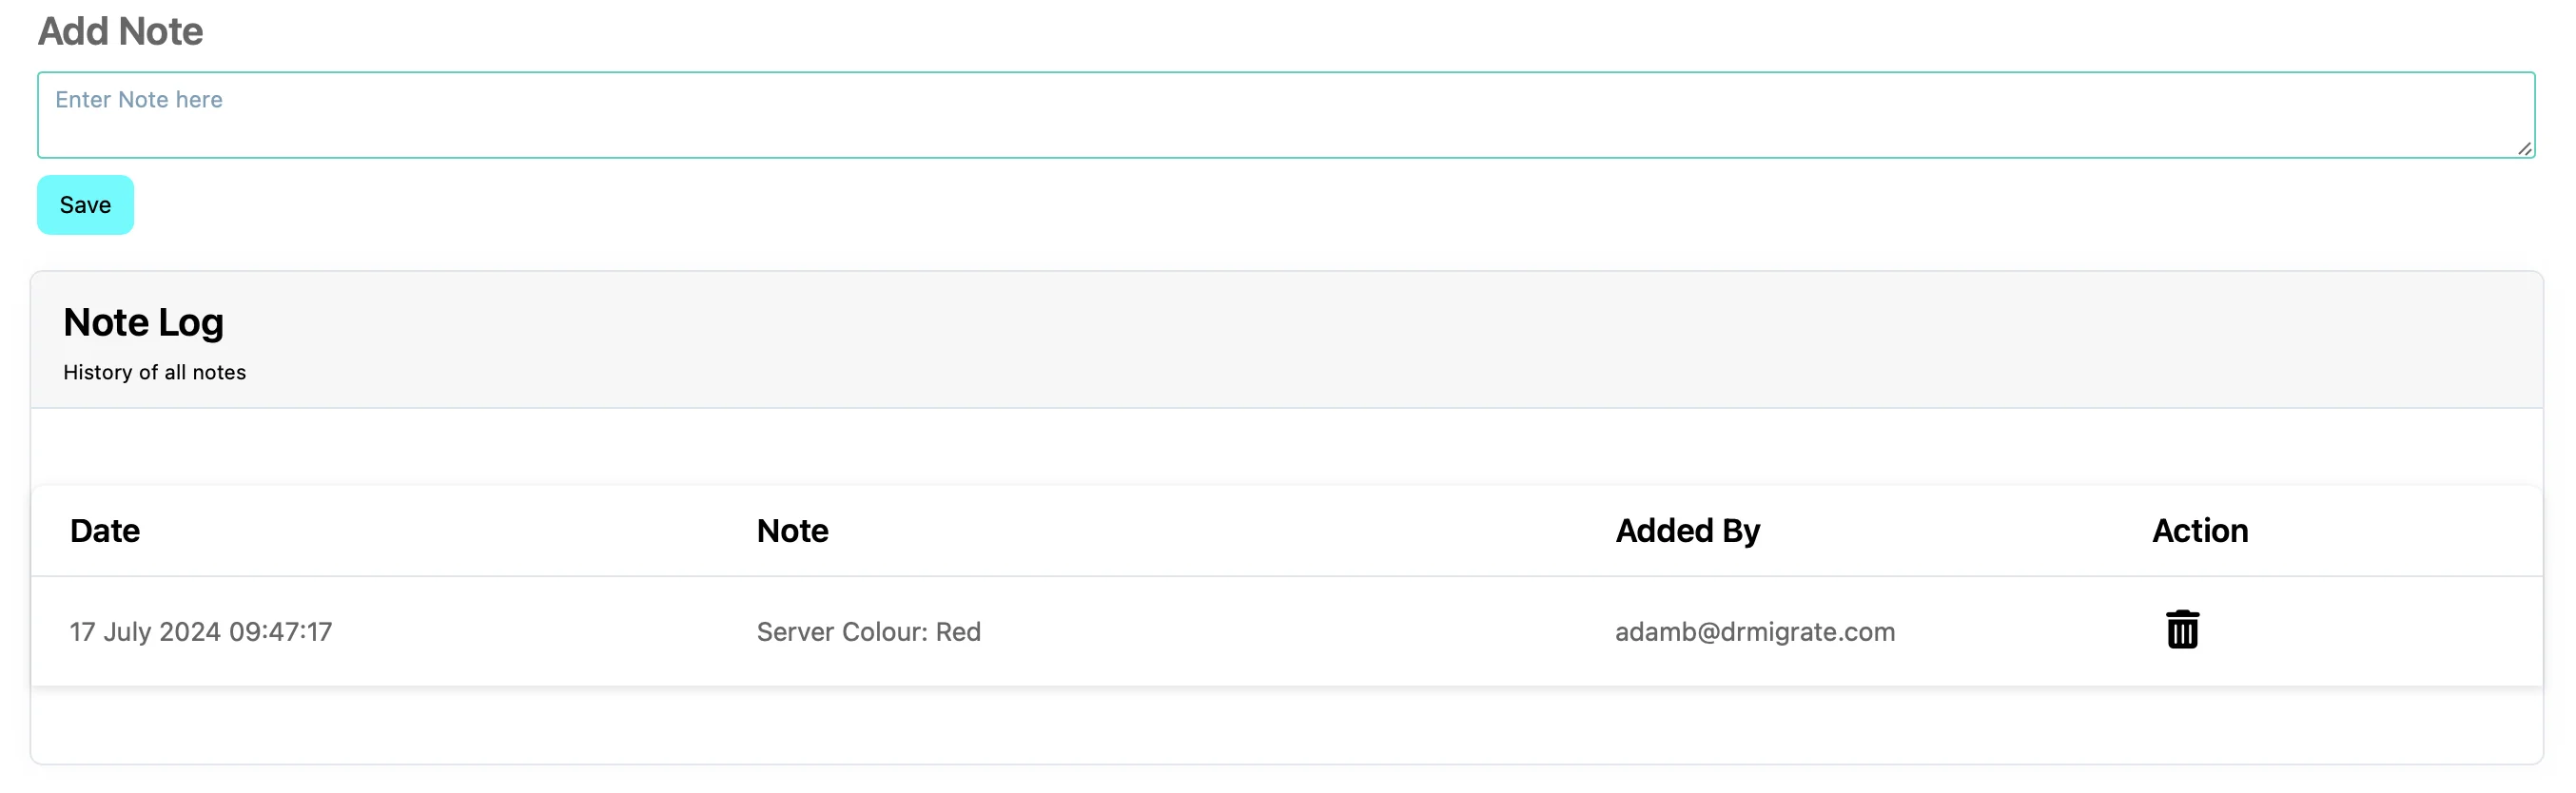
Here you can add longer form notes, such as application narrative content.