Marketplace
The Azure Marketplace offering deploys a managed application that contains the Dr Migrate solution to the customer’s Azure tenant.
Locate the Azure Marketplace Offer
On the customer’s Azure tenant, navigate to the Azure Marketplace.
If the customer’s subscription has been added to Dr Migrate then the offer can be found: Under the My Marketplace section, within the Private Plans item.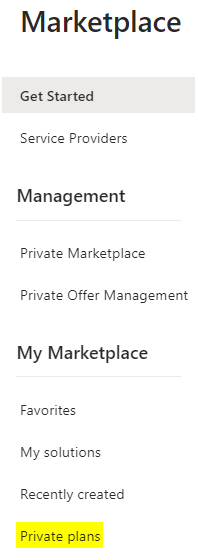
Private Plan Menu in Azure Marketplace
Create the Deployment
You will be redirected to the Dr Migrate Marketplace Offer within the Azure Portal. To proceed simply click the create button.
This will launch the deployment wizard which will enable you to deploy Dr Migrate.
Configure the Deployment
A guide to completing the fields within the install wizard follows:
Azure Marketplace Deployment Configuration
Basics
- Subscription - Top level logical container used to provision and manage resources.
- Resource Group - Logical container for resources for Dr Migrate.
- Region - The location where all resources will be deployed.
- Application Name - The friendly name of the Managed application to be created.
- Managed Resource Group - The name of the application’s managed resource group that holds all the resources that are required by the managed application which the consumer has limited access to. In most cases, this does not need to be changed.
Deployment Details
- Organization Name - Name of your organization.
- Industry - Choose the industry that best describes your organization
- Credentials - Administrator username and password for the virtual machine. This can be used by the customer to log in for the first time.
- Virtual Machine Properties - The name and the size of the virtual machine to be deployed.
- Network Configuration - By default Dr Migrate is deployed in a isolated network configuration. Alternatively existing Virtual Network and Subnets can be associated with the deployment.
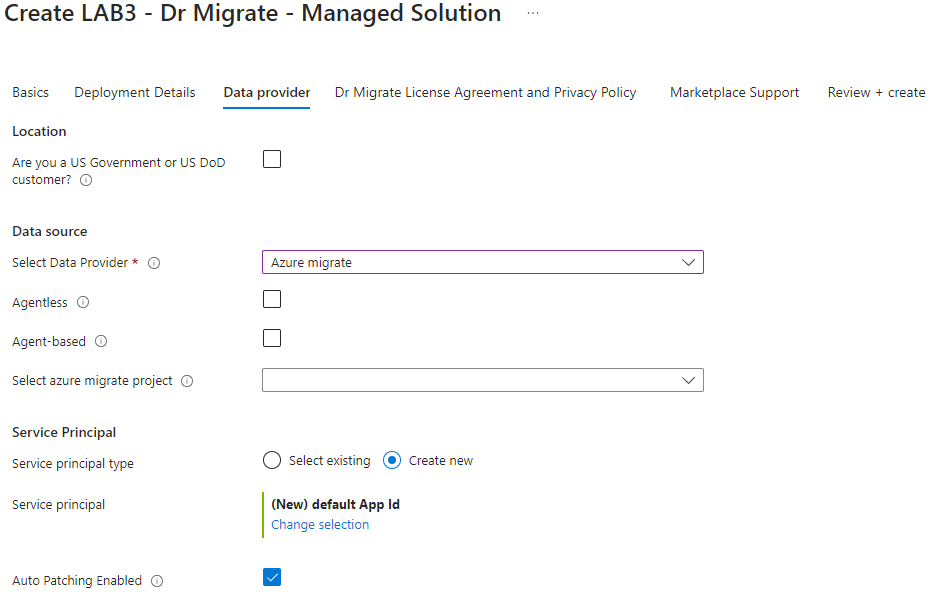
Data Provider
Azure Migrate has multiple ways of collecting dependency analysis, depending on your deployment requirements. Learn More: Agentless Vs Agent Based Discovery
- Data Provider Selection - Selection of Azure Migrate as Data Provider.
- Agentless Discovery - Select this if you are using Agentless dependency analysis in your Azure Migrate Project Configuration
- Agent-Based Discovery - Select this if you are using Agent Based dependency analysis in your Azure Migrate Project Configuration
- Azure Migrate Project - Select an existing Azure Migrate project.
- Service Principal - Select existing Azure Service Principal. Find the SPN created during prerequisite steps and enter the Password, this should be the Secret Value created during the perquisites step.
License Agreement and Privacy Policy
- Dr Migrate Licence Agreement - Dr Migrate Licence Agreement is available to review.
- Dr Migrate Privacy Policy – Dr Migrate Privacy Policy is available to review.
- Terms and Conditions Acceptance - Check to accept deployment terms and conditions.
- Dr Migrate Licence GUID - Licence GUID provided to you by your Deployment Engineer.
Marketplace Support
- Marketplace Support Acceptance - Check to accept Marketplace Support Terms.
Review and Create
All that’s left is to accept the Dr Migrate License Agreement, Marketplace Terms and hit create to being the deployment of Dr Migrate!