SaaS
Before Dr Migrate is deployed verify the below prerequisites to ensure a smooth deployment.
Pre-deployment Checklist for Dr Migrate
Use the checklist below a reference point to ensure that the environment is ready for a Dr Migrate deployment
| Requirement | Learn More | |
|---|---|---|
| ✅ | A user with needed Entra & Azure permissions. | Learn More |
| ✅ | Deploy and configure Azure Migrate Project and Appliance. | Learn More |
| ✅ | Create a Service Principal with a client secret. | Learn More |
| ✅ | Assign necessary roles to the Service Principal. | Learn More |
| ➡️ | Subscribe to Dr Migrate Cloud to activate your instance. | Learn More |
Before a Dr Migrate Cloud instance is synced with Azure Migrate, verify the below prerequisites to ensure a smooth deployment.
Permissions Required
Ideally the user performing the following steps should have the Global Administrator role.
If this is not possible, the least privileged approach to deployment requires the following permissions:
- Application Admin
- Subscription Owner
More information about least privileged role assignment please see the Microsoft Learn Portal
Azure Migrate Configuration
Azure Migrate is a mandatory prerequisite for Dr Migrate. Successful assessments have Azure Migrate installed, configured and collecting data prior to Dr Migrate deployment.
The type of infrastructure you are collecting data from will require a specific Azure Migrate install and configuration path. Follow the button below for a specific Azure Migrate deployment guide to suite your context.
Azure Migrate Deployment Guides according to target infrastructure:
Deploy and configure Azure Migrate
Dr Migrate leverages the data collection capability of Azure Migrate. Ensure that you have:
- Deployed an Azure Migrate Project.
- Deployed an Azure Migrate Appliance.
- Connected the Azure Migrate Project and Appliance.
- Provided all necessary permissions to collect data.
Microsoft has robust and detailed guides on how to deploy and configure Azure Migrate here.
Review Azure Migrate Project Connectivity Method
Create Service Principal
Dr Migrate requires a Service Principal be created to allow the Dr Migrate server to communicate with Azure Migrate.
When creating the SPN please observe the following:
- SPN Name - It is recommended to name the App Registration “drmigrate-spn”. All other settings can be left as default
- Client Secret Creation - Dr Migrate requires a client secret to be created, it is recommended to set the expiry to 12 months.
For Microsoft documentation on creating a Service Principal in Entra ID, see here
Configure Access
Assign your Service Principal, the following permissions:
| Role | Scope | Requirement |
|---|---|---|
| Contributor | Subscription or Resource Group where Dr Migrate and Azure Migrate will be located | Mandatory |
| Cost Management Reader | Subscription where Azure Migrate is deployed. | Optional |
Learn More about how to assign RBAC roles here
Subscription Configuration
Prerequisites
Ensure you login to Azure using an account within your Tenant that has appropriate permissions to deploy and configure resources as per this article. https://learn.microsoft.com/en-us/marketplace/purchase-saas-offer-in-azure-portal
Navigate to Azure Marketplace Private Plans
Navigate to Private Plans within Azure Marketplace.
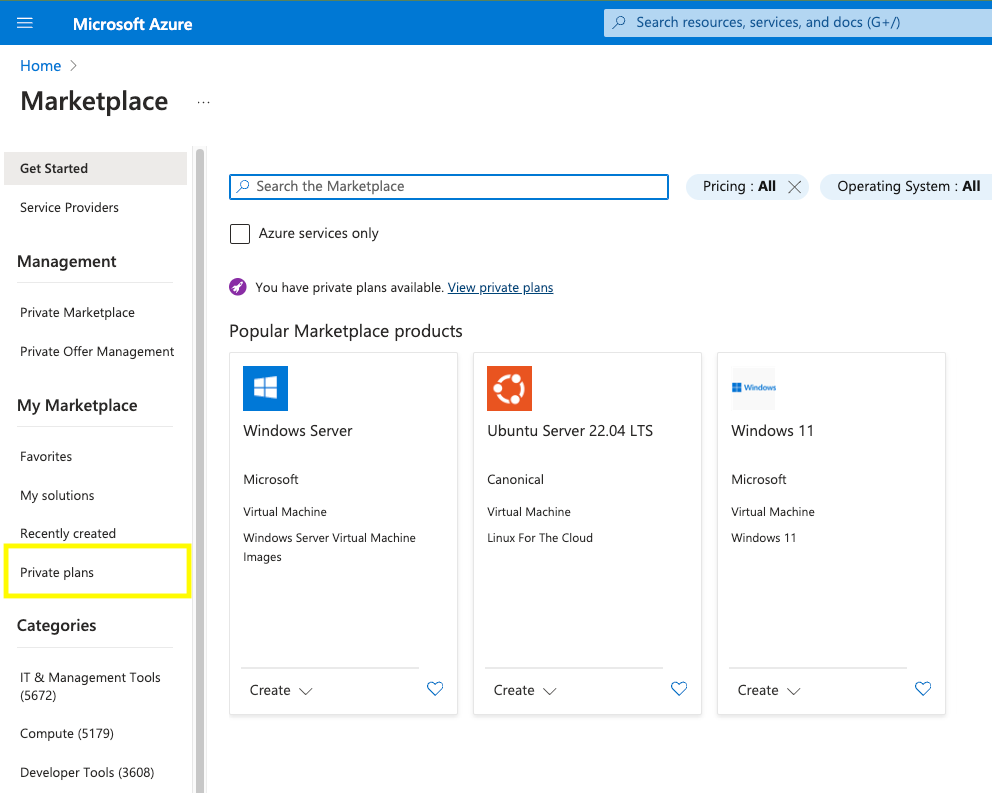
Azure Marketplace Private Plans
Select Altra Plan
Select plan - Altra - Dr Migrate - Express SaaS
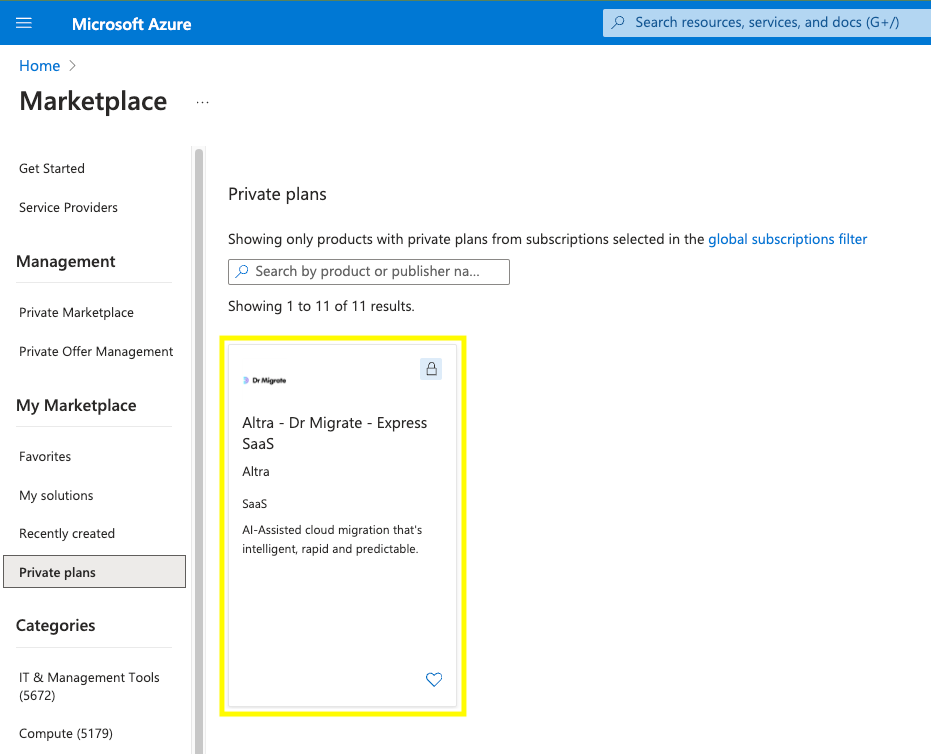
Altra - Dr Migrate - Express SaaS plan
Complete Project Details
To activate your Dr Migrate license, you’ll need to complete the Project details section in the Azure Marketplace form. This tells Azure where to deploy the required resource and enables your license.
Required Fields:
- Select a Subscription
- Determines where usage and billing (if applicable) are recorded
- Choose or Create a Resource Group
- This container manages your Dr Migrate SaaS subscription resource
- You may create a new one if needed
- SaaS Details
- Enter any name for your resource (any name is fine)
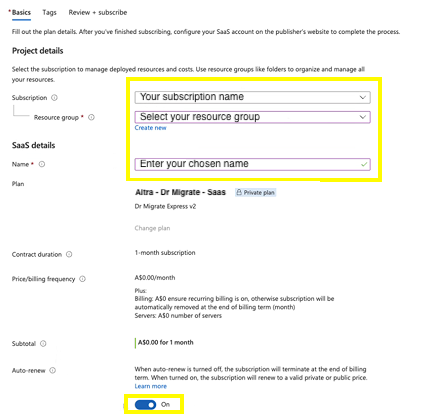
Project Details Form
Review and Subscribe
Click on Review + subscribe.
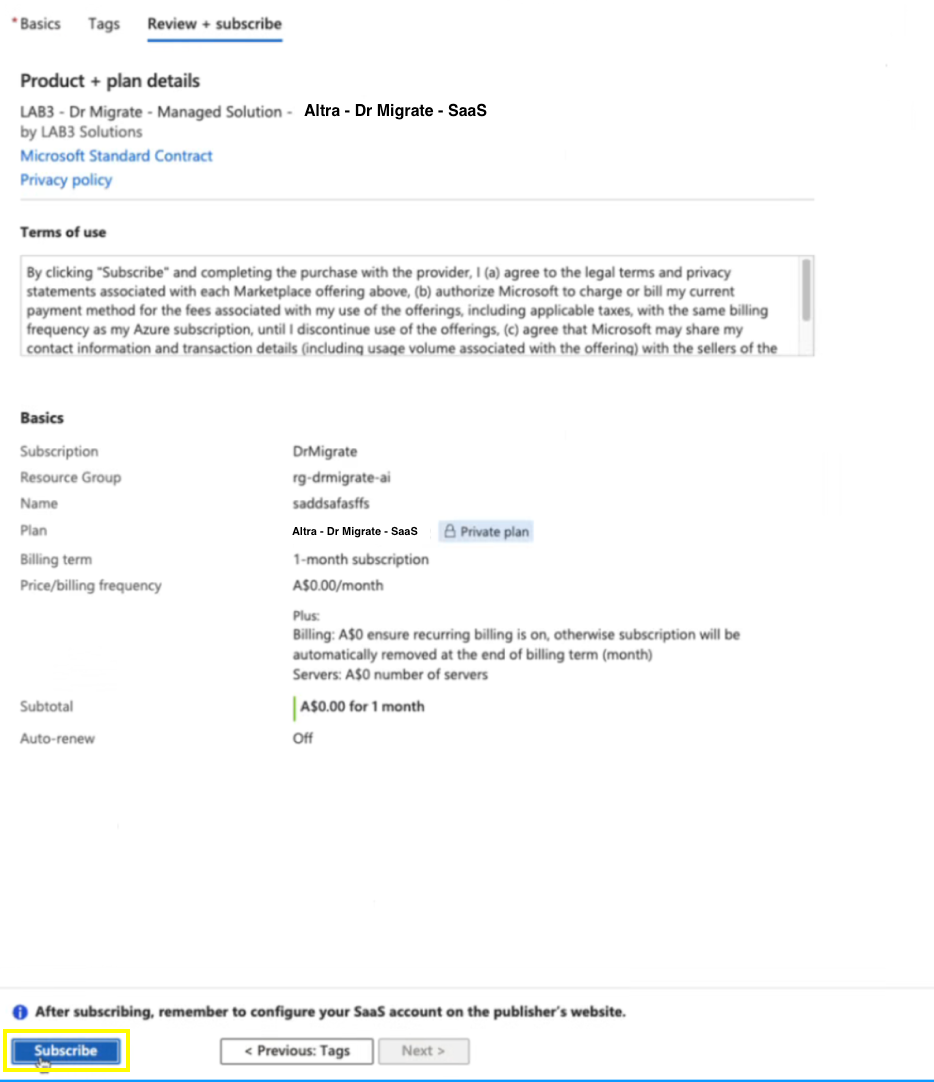
Review and Subscribe
Configure Account
Click on Configure account now.
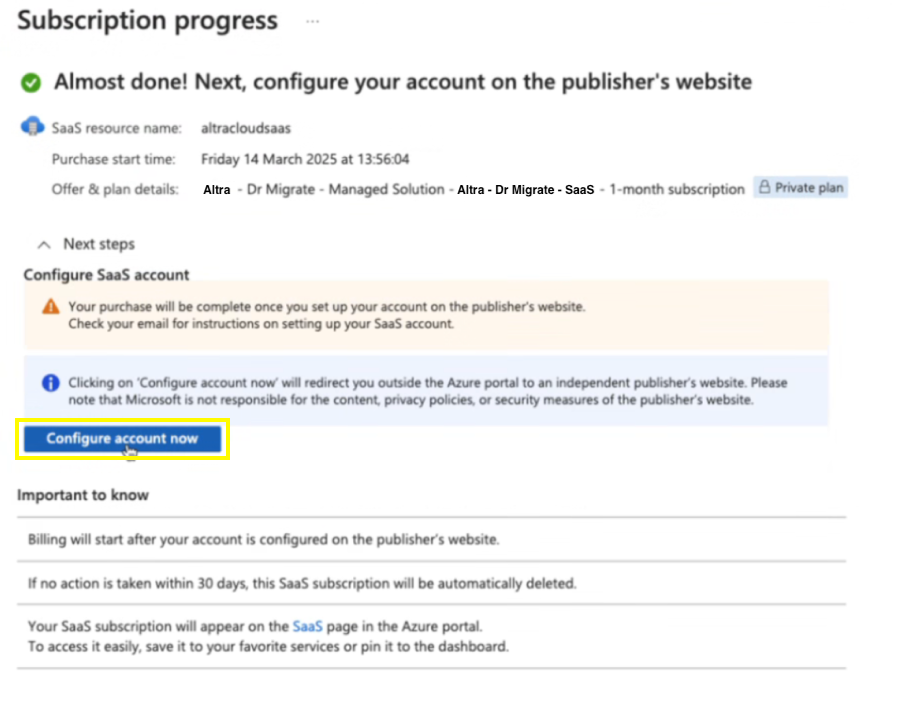
Configure Account Button
Troubleshooting
If you aren’t able to click on Configure account now after the subscription has processed, please ensure all the below criteria is met and, and ensure all sections in Step 3 are complete.
- Check the permissions to the subscription and resource group you have selected on the Purchase your SaaS in the Azure Portal page under the requirements section.
- Ensure you are set as Contributor on the resource group.
- Start a new session by navigating through this link to the Azure Portal and repeat this work instruction.
If you are still experiencing issues, please contact support@altra.cloud for support.
If the “Configure account now” button remains unavailable after subscription processing:
- Verify Completion
- Confirm every section in Step 4 - Complete Project Details are correct and complete.
- Check Permissions
- Refer to Purchase your SaaS in the Azure Portal under the requirements section and check your permissions for the subscription and resource group
- Required Role
- You must have Contributor access on the resource group
- Refresh Session
- Start a new session by accessing Azure Marketplace
- Repeat this work instruction
Still Having Issues? Contact our support team at support@altra.cloud for assistance.
Complete Microsoft Authorization
Log in using your Microsoft account credentials. Click ‘Accept’ on the pop-up authorization box to proceed.
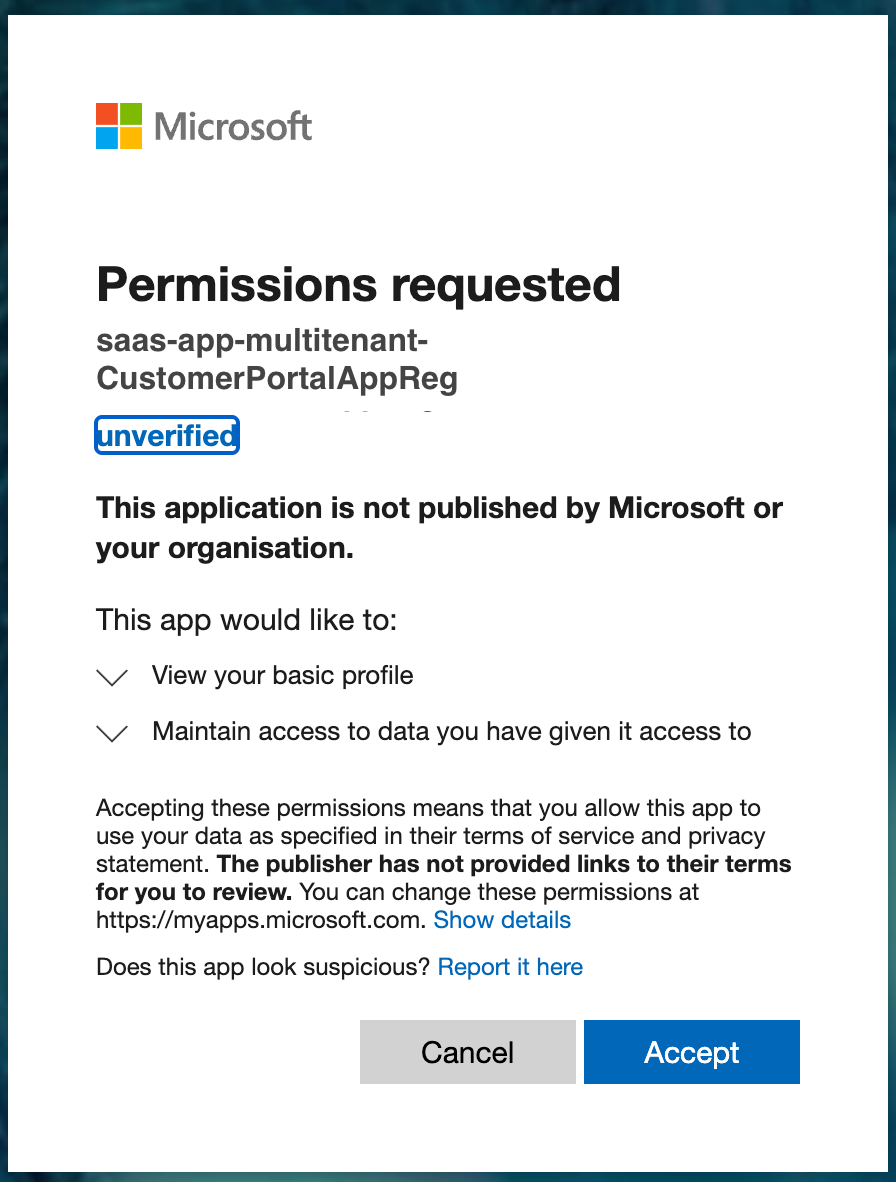
Microsoft Authorization
Set Up Deployment ID
You will be automatically redirected to the Dr Migrate Customer Subscription Portal.
Find the Deployment ID in the Dr Migrate Portal

Finding Deployment ID
Locate and copy the provided Deployment ID
Deployment ID Field
Paste this ID into the designated Deployment ID field in the Dr Migrate Customer Subscription Portal

Deployment ID Field
Continue Setup
Once you’ve activated the subscription, return to the Dr Migrate Portal Azure Subscription Setup step and continue with Step 4.
