Data Migration Assistant
Microsoft’s Data Migration Assistant (DMA) helps you upgrade to a modern data platform by detecting compatibility issues that can impact database functionality when you:
- Upgrade to a new version of SQL Server
- Migrate to Azure SQL Database
- Migrate to Azure SQL Managed Instance
For more information please visit the Microsoft documentation.
Dr Migrate integrates with DMA, to provide deeper insights into your data discovery at scale.
Whilst not required as Azure Migrate’s native SQL discovery is usually sufficient. Deeper insights can be provided by leveraging DMA with Dr Migrate.
Download Data Migration Assistant
DMA can be downloaded here.
When installing DMA, here are some Microsoft best practices prior to running the installation:
- It is recommended to not running DMA directly on a SQL Server Host Machine.
- It is recommended that you execute DMA from your Azure Migrate Virtual Machine.
- It is required to execute DMA from a machine with network line-of-sight to the SQL Server machines that need to be assessed.
- Execute the DMA against Non-Production Databases first, monitor performance and then run on Production databases.
- Execute assessments on Production databases during non-peak times.
Download SQL Advanced Analytics
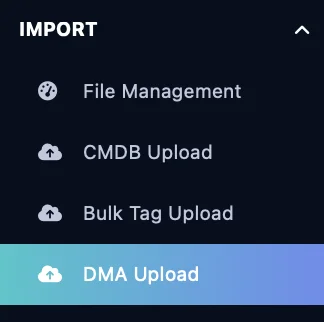
From the left hand side menu, select DMA Upload
You can download the DMA Script from this screen. This will download a Zip file.
Populate DatabaseOwnerInformation.csv
DatabaseOwnerInformation.csv is used to denote the SQL Servers that you wish to execute DMA against. In the template you will need to fill out the following:
| InstanceName: | Example LAB3SRV0 |
|---|---|
| DatabaseName | Leave Blank (All databases inside the servers are enumerated) |
| DBOwner | Fill in if known |
| Environment | Fill in if known |
| aa_id | Leave Blank |
| Target-SqlServer2012 | if assessment required update to “Assess” |
| Target-SqlServer2014 | if assessment required update to “Assess” |
| Target-SqlServer2016 | if assessment required update to “Assess” |
| Target-SqlServerWindows2017 | if assessment required update to “Assess” |
| Target-SqlServerLinux2017 | if assessment required update to “Assess” |
| Target-AzureSqlDatabase | if assessment required update to “Assess” |
| Target-ManagedSqlServer | if assessment required update to “Assess” |
Once completed, save this file.
Run DMA Script
Log into the server that you wish to run the DMA script from, it is recommend this is the server you have Azure Migrate installed on.
Open Powershell and execute the Lab3-DMAAssessment.ps1 script as an administrator.
Using Windows Authentication
Enter the following Script in PowerShell
.\Lab3-DMAAssessment.ps1 -CsvFile C:\DMA\DatabaseOwnerInformation.csvThis will collect data for 1 day, every 10 minutes, using Windows Authentication, to connect to each SQL Server as defined in Severlist.csv.
Using SQL Authentication
Enter the following Script in PowerShell
.\Lab3-DMAAssessment.ps1 -CsvFile C:\DMA\DatabaseOwnerInformation.csv -Credentials (Get-Credential)Import DMA Output
After running the Dr Migrate PowerShell script which will automatically generate multiple JSON output files that will be downloaded to desired output location.
Create Zip Archive
Create a zip archive the files.
Transfer Archive
Transfer the collected Analytics data to the Dr Migrate instance, this can be done using the File Management function.
Upload Archive
From the DMA Upload Menu, select the outputted zip file from the SQL Advanced Analytics Script. Once selected, click submit to upload the file, and begin processing.