Azure Rightsizing Export
Dr Migrate offers tools that allow you to adjust the settings for the virtual machine (VM) type and disk setup. This allows you to override any of the SKU’s that have been chosen by Azure Migrate.
Additionally, the rightsizing report gives you a detailed export of the recommended Azure configurations for all the servers evaluated
How to Export
Access Insights
The Azure Rightsizing Report Export can be found in the Insights chevron

Generate
Click on the “Generate” button to create a new Azure Right Sizing Export. Depending environment size, it may take between 1-15 minutes.

Download
Once the export is generated, your download link will become available. To see the last time a report was generated, check the “Last Generated” column.
Click the copy icon and paste the secure link into your local desktop’s browser to download to your local machine.

Editing the Righzing Report
Once downloaded, you can open the file in Microsoft Excel, you should make any edits, and save this file.
Servers Tab
The first tab in the workbook is the Severs tab, this tab provides a list of all the servers that have been discovered by Dr Migrate, with a series of editable and non-editable fields.
The fields below are editable, all other fields can not be modified.
| Field | Usage |
|---|---|
| Target Azure Region | The current Target Azure Region for this machine, this defaults to the region selected within Dr Migrate Setup, but can be modified to match your requirement |
| Chosen SKU | The current Azure SKU for this machine, this is the SKU pulled from the Azure Migrate Assessment, it can be changed using the drop down. |
| Chosen Payment Model | The current Payment Model for this machine, this defaults to the default SKU within Dr Migrate Setup, but can be modified to match your requirement. |
| Hybrid Benefit Setting | If the machine should be priced with Azure Hybrid Benefit applied |
| SQL Hybrid Benefit Setting | If the machine should be priced with Azure SQL Hybrid Benefit applied |
| Dev/Test Setting | If the machine should be priced with Dev/Test Pricing applied |
| Hours Powered On (Daily) | The number of hours this machine is powered on during an average day, this should be used in combination with the Dev/Test Setting |
| Backup Setting | If the machine should be priced with Azure Backup |
| Disaster Recovery Setting | If the machine should be priced with Azure Site Recovery |
Disk Tab
The second tab in the workbook is the Disk tab, this tab provides a list of the disk details of all servers discovered, with a series of editable and non-editable fields.
| Field | Usage |
|---|---|
| Chosen Disk SKU | The current Azure SKU for this machine, this is the SKU pulled from the Azure Migrate Assessment, it can be changed using the drop down. |
| Disk Size GB (Ultra & Premium SSDv2 Only) | If the disk is sized for a Ultra or Premium SSDv2, its Size in GB will be shown here, else it will be blank |
| Provisioned IOPS (Ultra & Premium SSDv2 Only) | If the disk is sized for a Ultra or Premium SSDv2, its amount of provisioned IOPS will be shown here, else it will be blank |
| Provisioned Throughput (MBPS) (Ultra & Premium SSDv2 Only) | If the disk is sized for a Ultra or Premium SSDv2, its amount of provisioned throughput will be shown here, else it will be blank |
| Storage Target | The desired target storage type for this disk, can choose from Managed Disk (default), Blob Storage - Hot, Blob Storage - Cool, Blob Storage - Archive, this defines how you would like the disk priced. |
| Payment Model (Blob Storage Only) | If you have selected a Storage Type of Blob Storage Hot, Cool, or Archive, this field denotes the Payment model of PAYG, 1Yr, 3Yr. |
| Storage Redundancy (Blob Storage Only) | If you have selected a Storage Type of Blob Storage Hot, Cool, or Archive, this field denotes the data redundancy for the stored data choose from LRS,ZRS,GRS,GZRS,RA-GRS,RA-GZRS |
Editable fields are either changeable via, validated, drop-down, or free text, depending on the field.
Uploading the Rightsizing Export
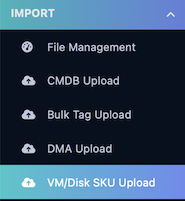
Rightsizing Export Upload can be found in the menu, on the left hand side.

Choose Your Upload Method
Marketplace Upload Options
Direct to Storage Account

-
Copy the provided link and paste it into your desktops local browser. It will open an Azure Storage account window where you can upload the template.
⚠️If you encounter issues accessing the storage account, it is recommended you use the Secure Link option, to upload your mapping data. -
Once uploaded to the storage account, wait for 30 seconds. Then refresh the file list in Dr Migrate, once visible, click “Load into Dr Migrate” to load your mapping data.
Upload via Secure Link

This approach requires that you upload your application mapping to a secure file storage solution, such as Azure Blob storage, and generate a secure sharing link for Dr Migrate to use. Simply create a SaS link for your uploaded file, and paste it into the provided area, area and click load.
Click here to learn more about using Azure Blob Storage to upload files, and create SAS tokens.
SaaS Upload Options
Upload from Local Machine
