

Uploading & Viewing Results
Once your DMC scan is complete, upload the results from Discover > Data Sources > DMC. Click Upload Scan Results on the Upload Scan Results card to open the upload dialog.
Upload Scan Results
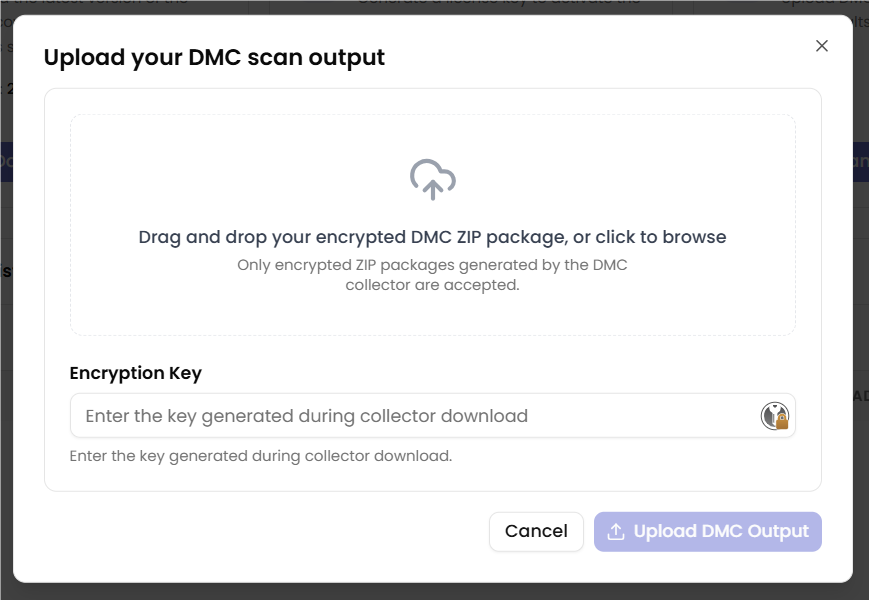
- Drag and drop your encrypted DMC ZIP package into the upload area, or click to browse for it.
- Enter the Encryption Key in the field below. This is the Decryption Key DMC displayed when you exported the scan.
- Click Upload DMC Output.
DMC generates the ZIP Password and Decryption Key at export time and shows them once. They are held in memory only and cannot be recovered after DMC closes. If you no longer have the Decryption Key, open DMC and export the scan again to get a new package with a new key.
After Upload
Dr Migrate decrypts and ingests the scan data automatically. Key environment metrics are parsed and transformed into insights-ready structures. This process typically takes 1 to 4 hours depending on environment size.
Once processing completes, you can view environment summaries including VM sizing, software inventory, and utilization metrics, and launch into the migration planning workflow.
Uploading Additional Scans
You can upload additional scan results at any time. Dr Migrate merges new data with your existing environment, so there is no need to re-upload previous results.
If your initial scan missed certain machines, run a new scan targeting only those machines and upload the result separately. For a complete rescan of your entire estate, upload the new results file and Dr Migrate updates existing machines while retaining historical context.
If you are scanning multiple environments (VMware vCenters, Hyper-V hosts, or physical machines), you can either upload scans one by one or combine them into a single upload by scanning each environment with DMC before zipping the output folder.
Once you connect Azure Migrate to your Dr Migrate instance, you cannot upload additional DMC scans. Ensure all scans are uploaded before making that connection.