Running DMC
Where to run DMC
DMC must be run from on a Windows-based VM with:
- Network access to vCenter and associated ESXi hosts.
- Sufficient storage (Minimum 20GB free space for collected data)
- For more details see the System and Access Requirements section
Downloading and running the DMC Package
- A secure download link will be supplied via email.
- Extract the package to a designated directory e.g.
C:\DMC
How to Unblock a Downloaded .exe File
- Right-click the .exe file you downloaded.
- Select Properties from the context menu.
- Under the General tab, look at the bottom for a section called Security.
- If you see a checkbox or button labeled Unblock, tick it or click it.
- Click Apply, then OK.
Run DMC
Launch DMC
Launch DMC.exe from your installation directory
Follow Instructions
Follow the on-screen prompts to complete the setup.
Prepare Scan
- DMC is specifically designed to allow a customer Administrator to securely utilise their admin credentials for a one-time operation.
- All credentials are stored in memory only and never persist beyond execution.
- Credentials requirements are tailored for one-time use, allowing administrators to securely employ their personal credentials.
Add vCenter Details
Begin by adding one or more vCenters that you wish to target for scanning.
Select Add vCenter button
Enter vCenter Credentials
Enter the vCenter Host and associated Username and Password with sufficient permission to perform the scan.
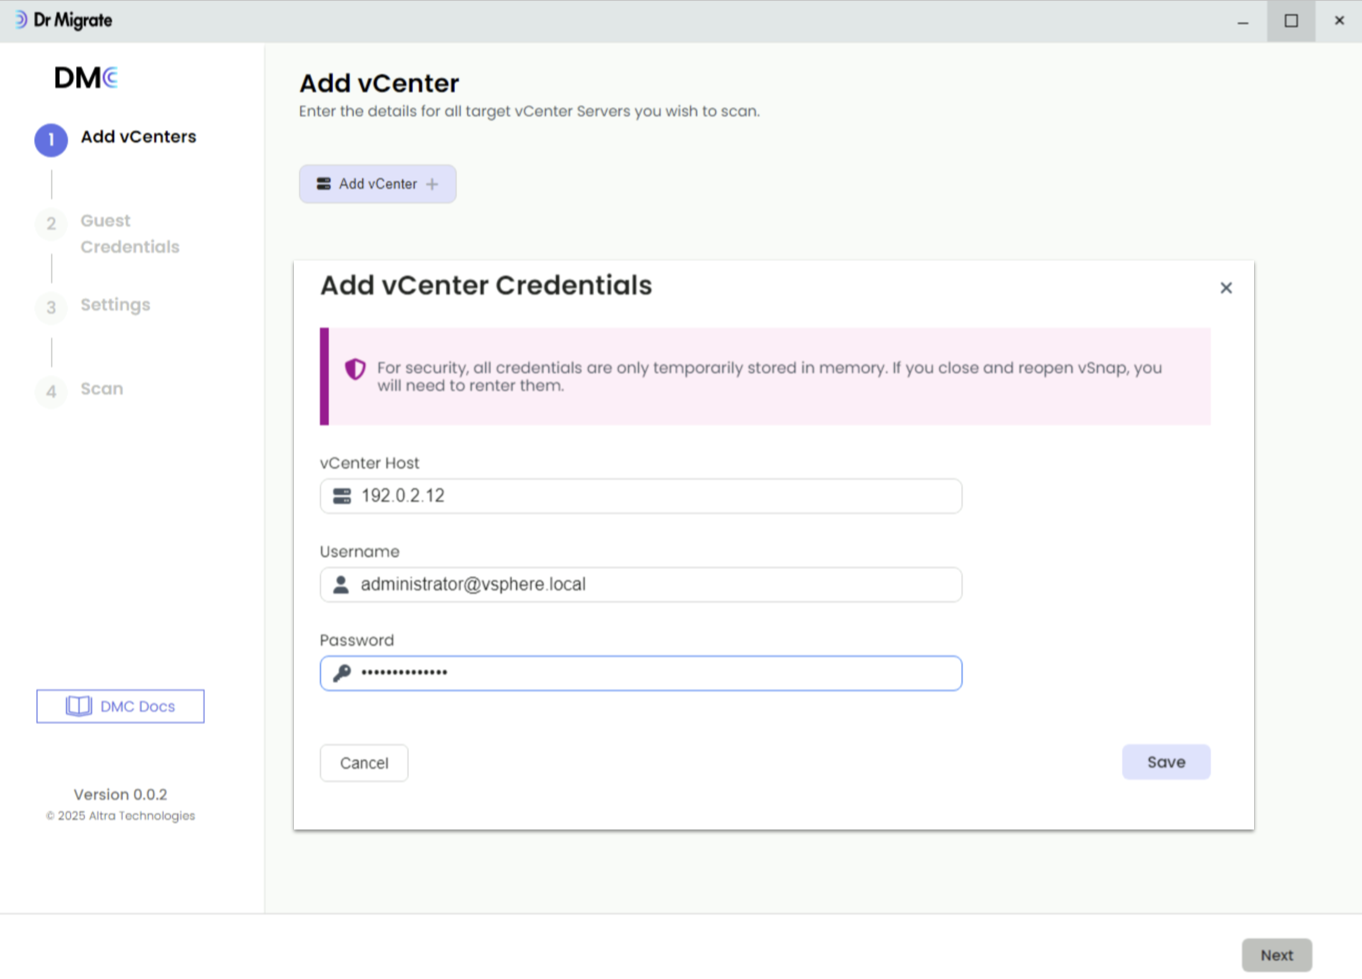
Initial vCenter connection screen
Click Next after you have added all target vCenters.
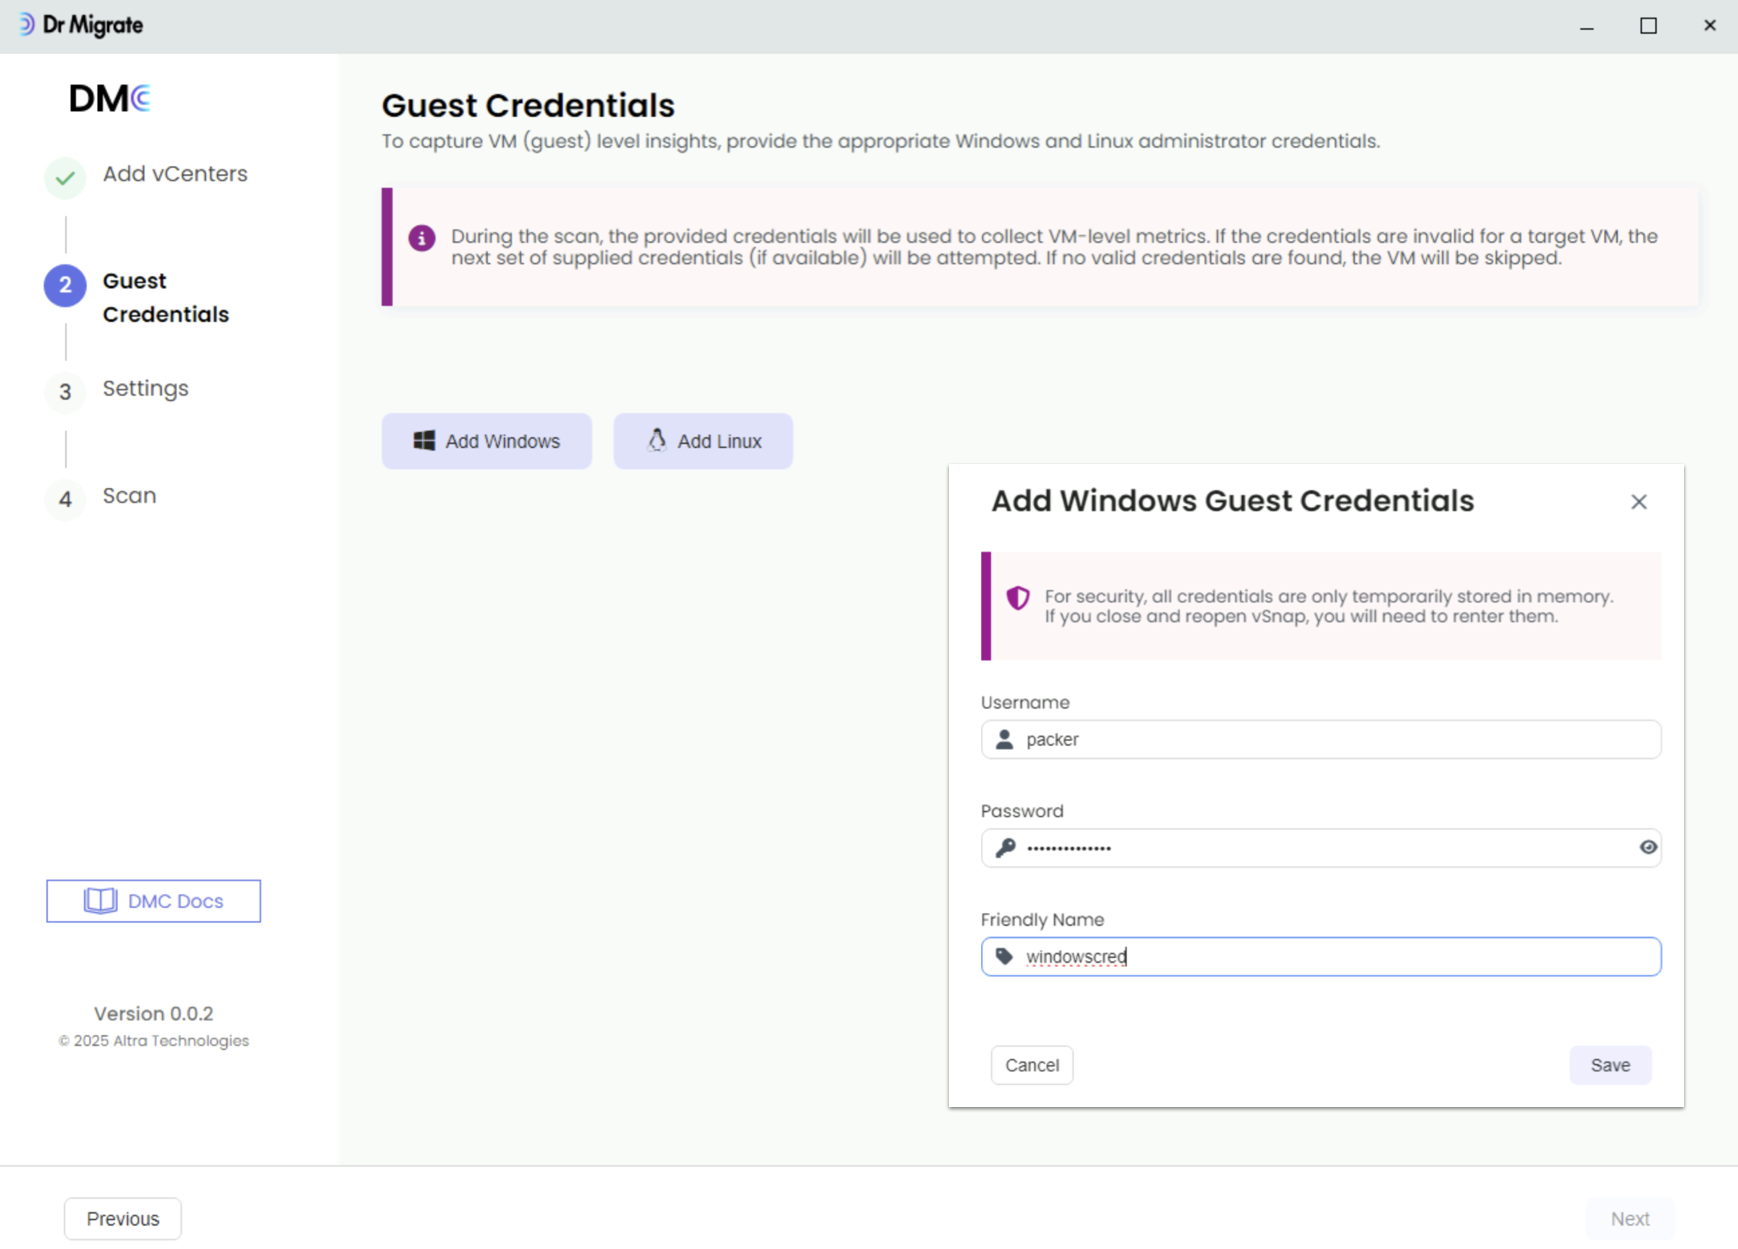
Add Guest Credentials
Now add credentials that will be used to connect to both Windows and Linux servers.
Select Add Windows / Add Linux buttons.
Enter the Username and Password with sufficient permission to collect guest metrics.
Validate Guest Credentials
Click Next. DMC will validate the entered credentials on a subset of your servers. Any invalid credentials are flagged.
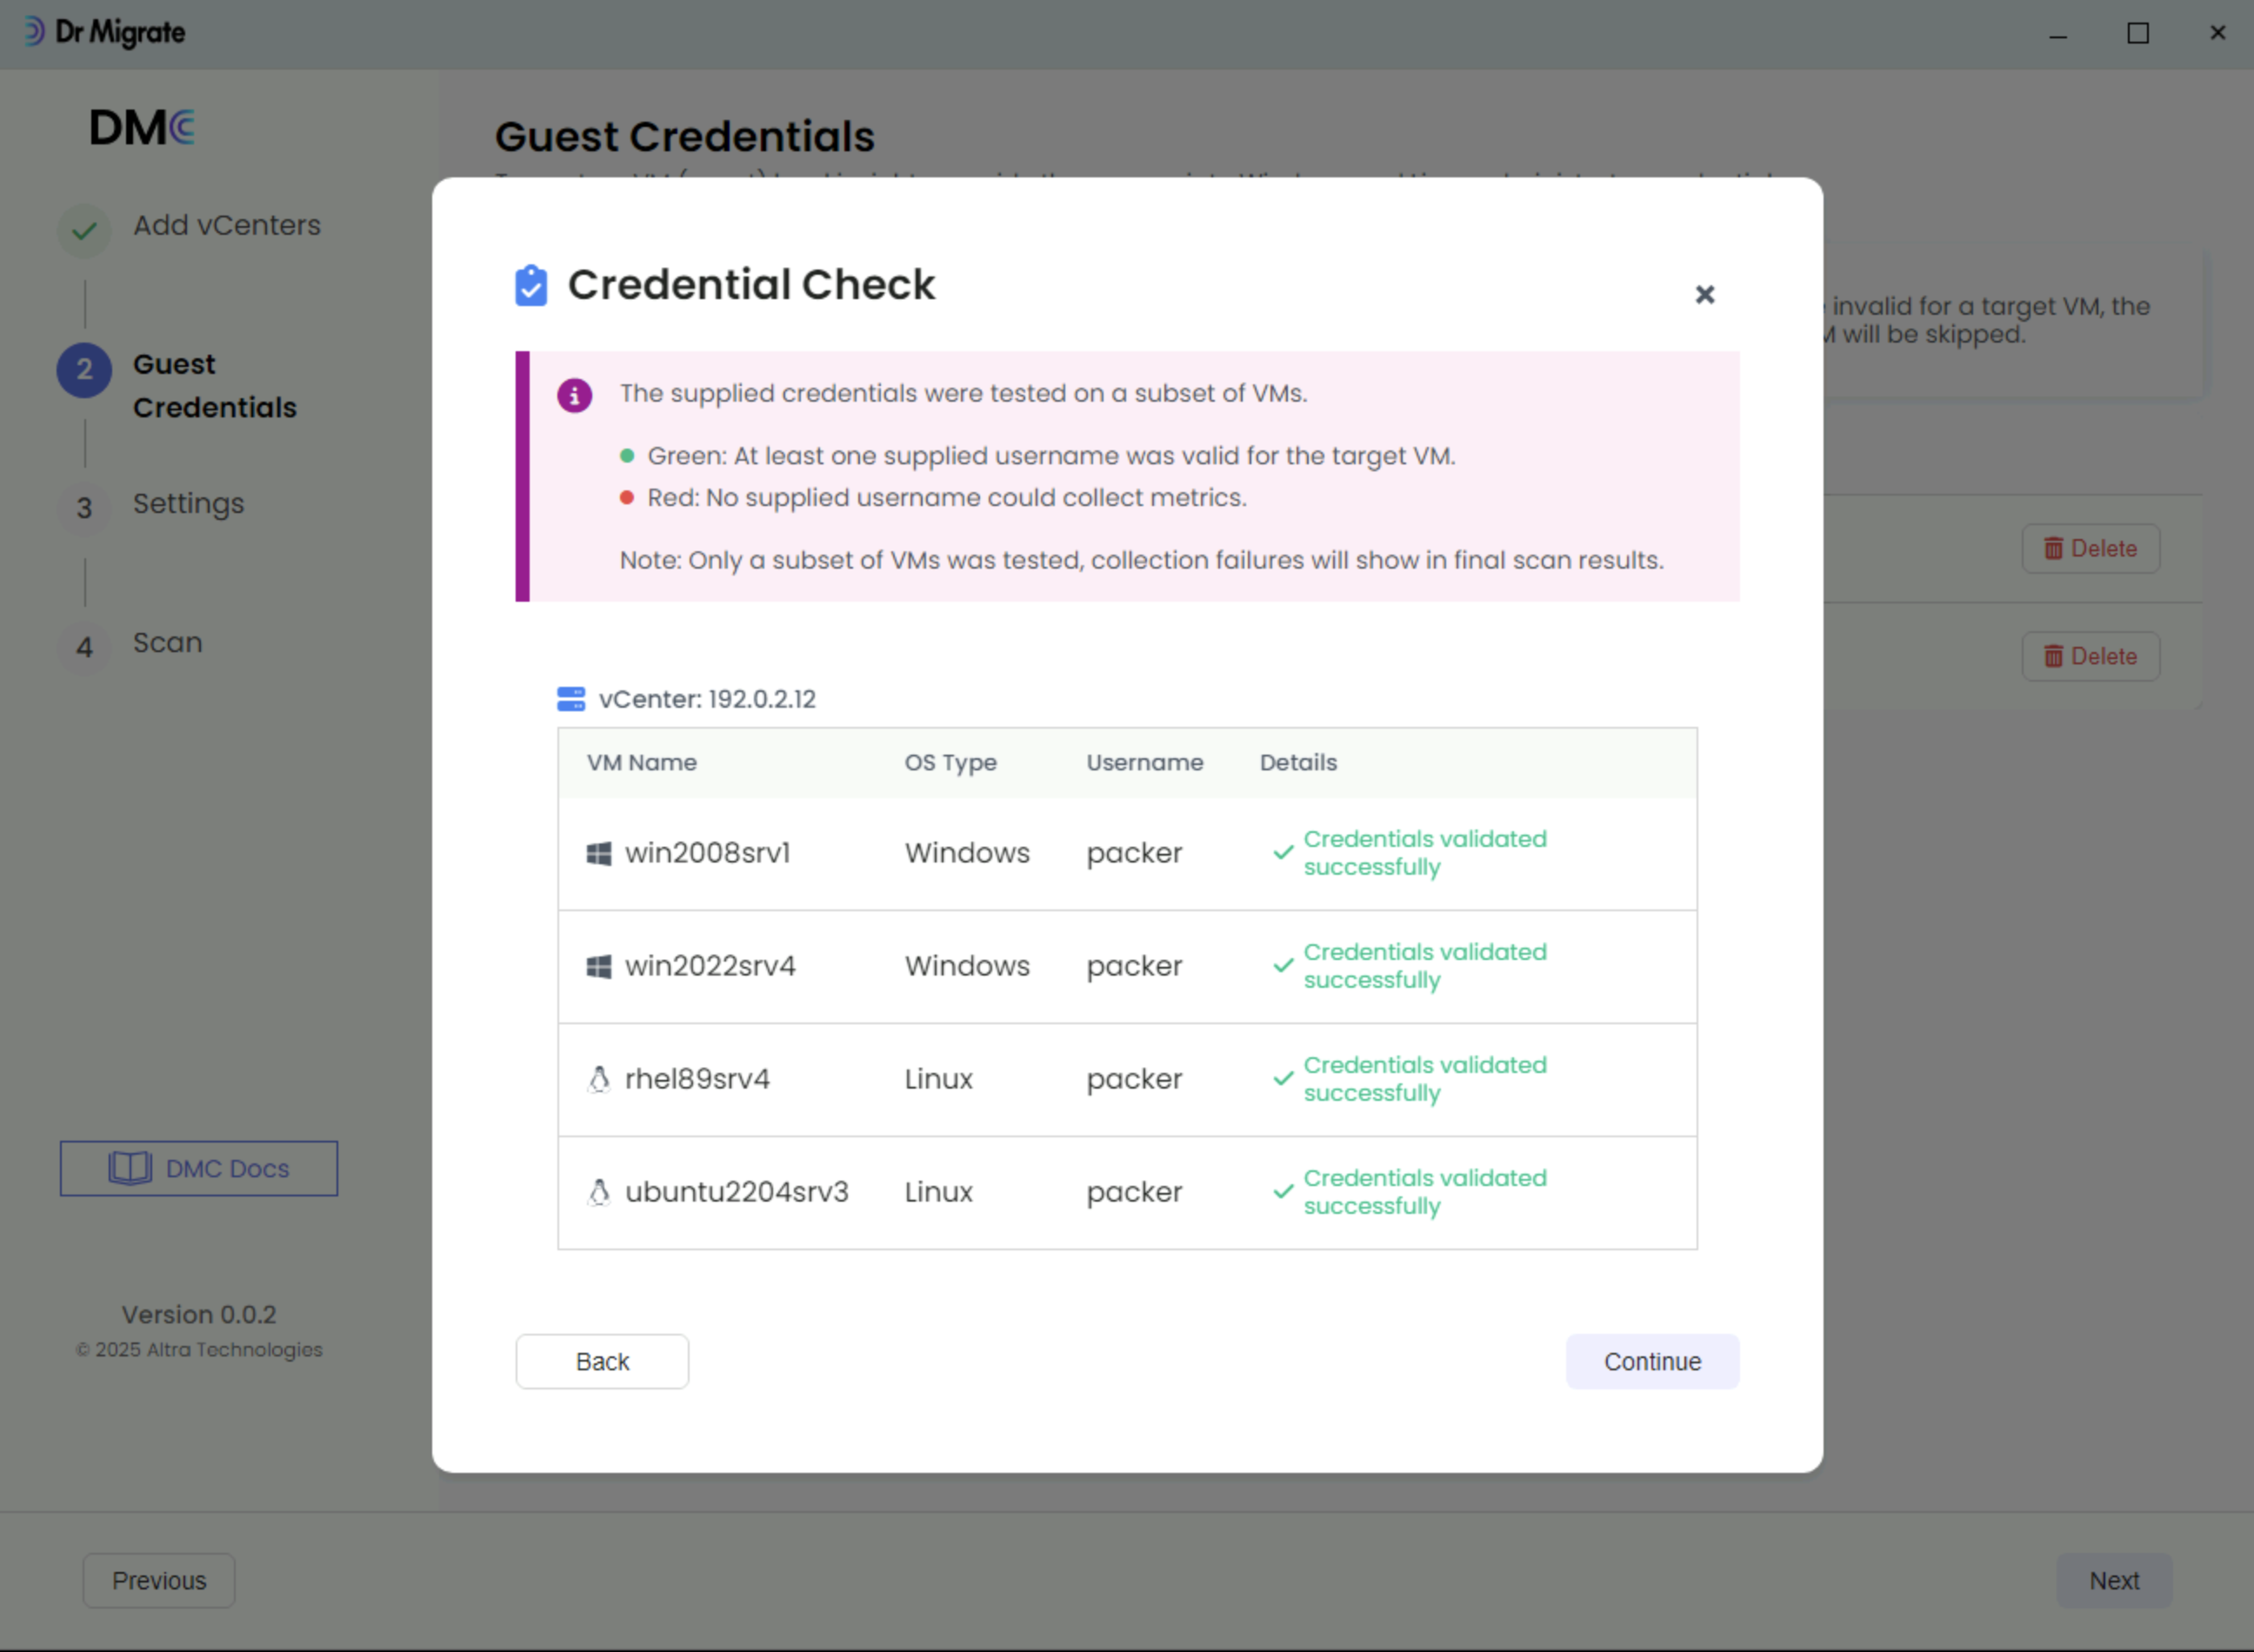
Click Continue after you validation completes.
Settings
Customize scan settings as required.
Configure Settings
| Setting | Description |
|---|---|
| Output Path | Directory where scan results and logs are saved |
| Max Concurrent Servers | Number of servers discovered at the same time |
| Max CPU Utilization | Skips discovery if a server’s CPU usage is above this threshold at the time of scanning. The average CPU spike is 2% when running DMC. |
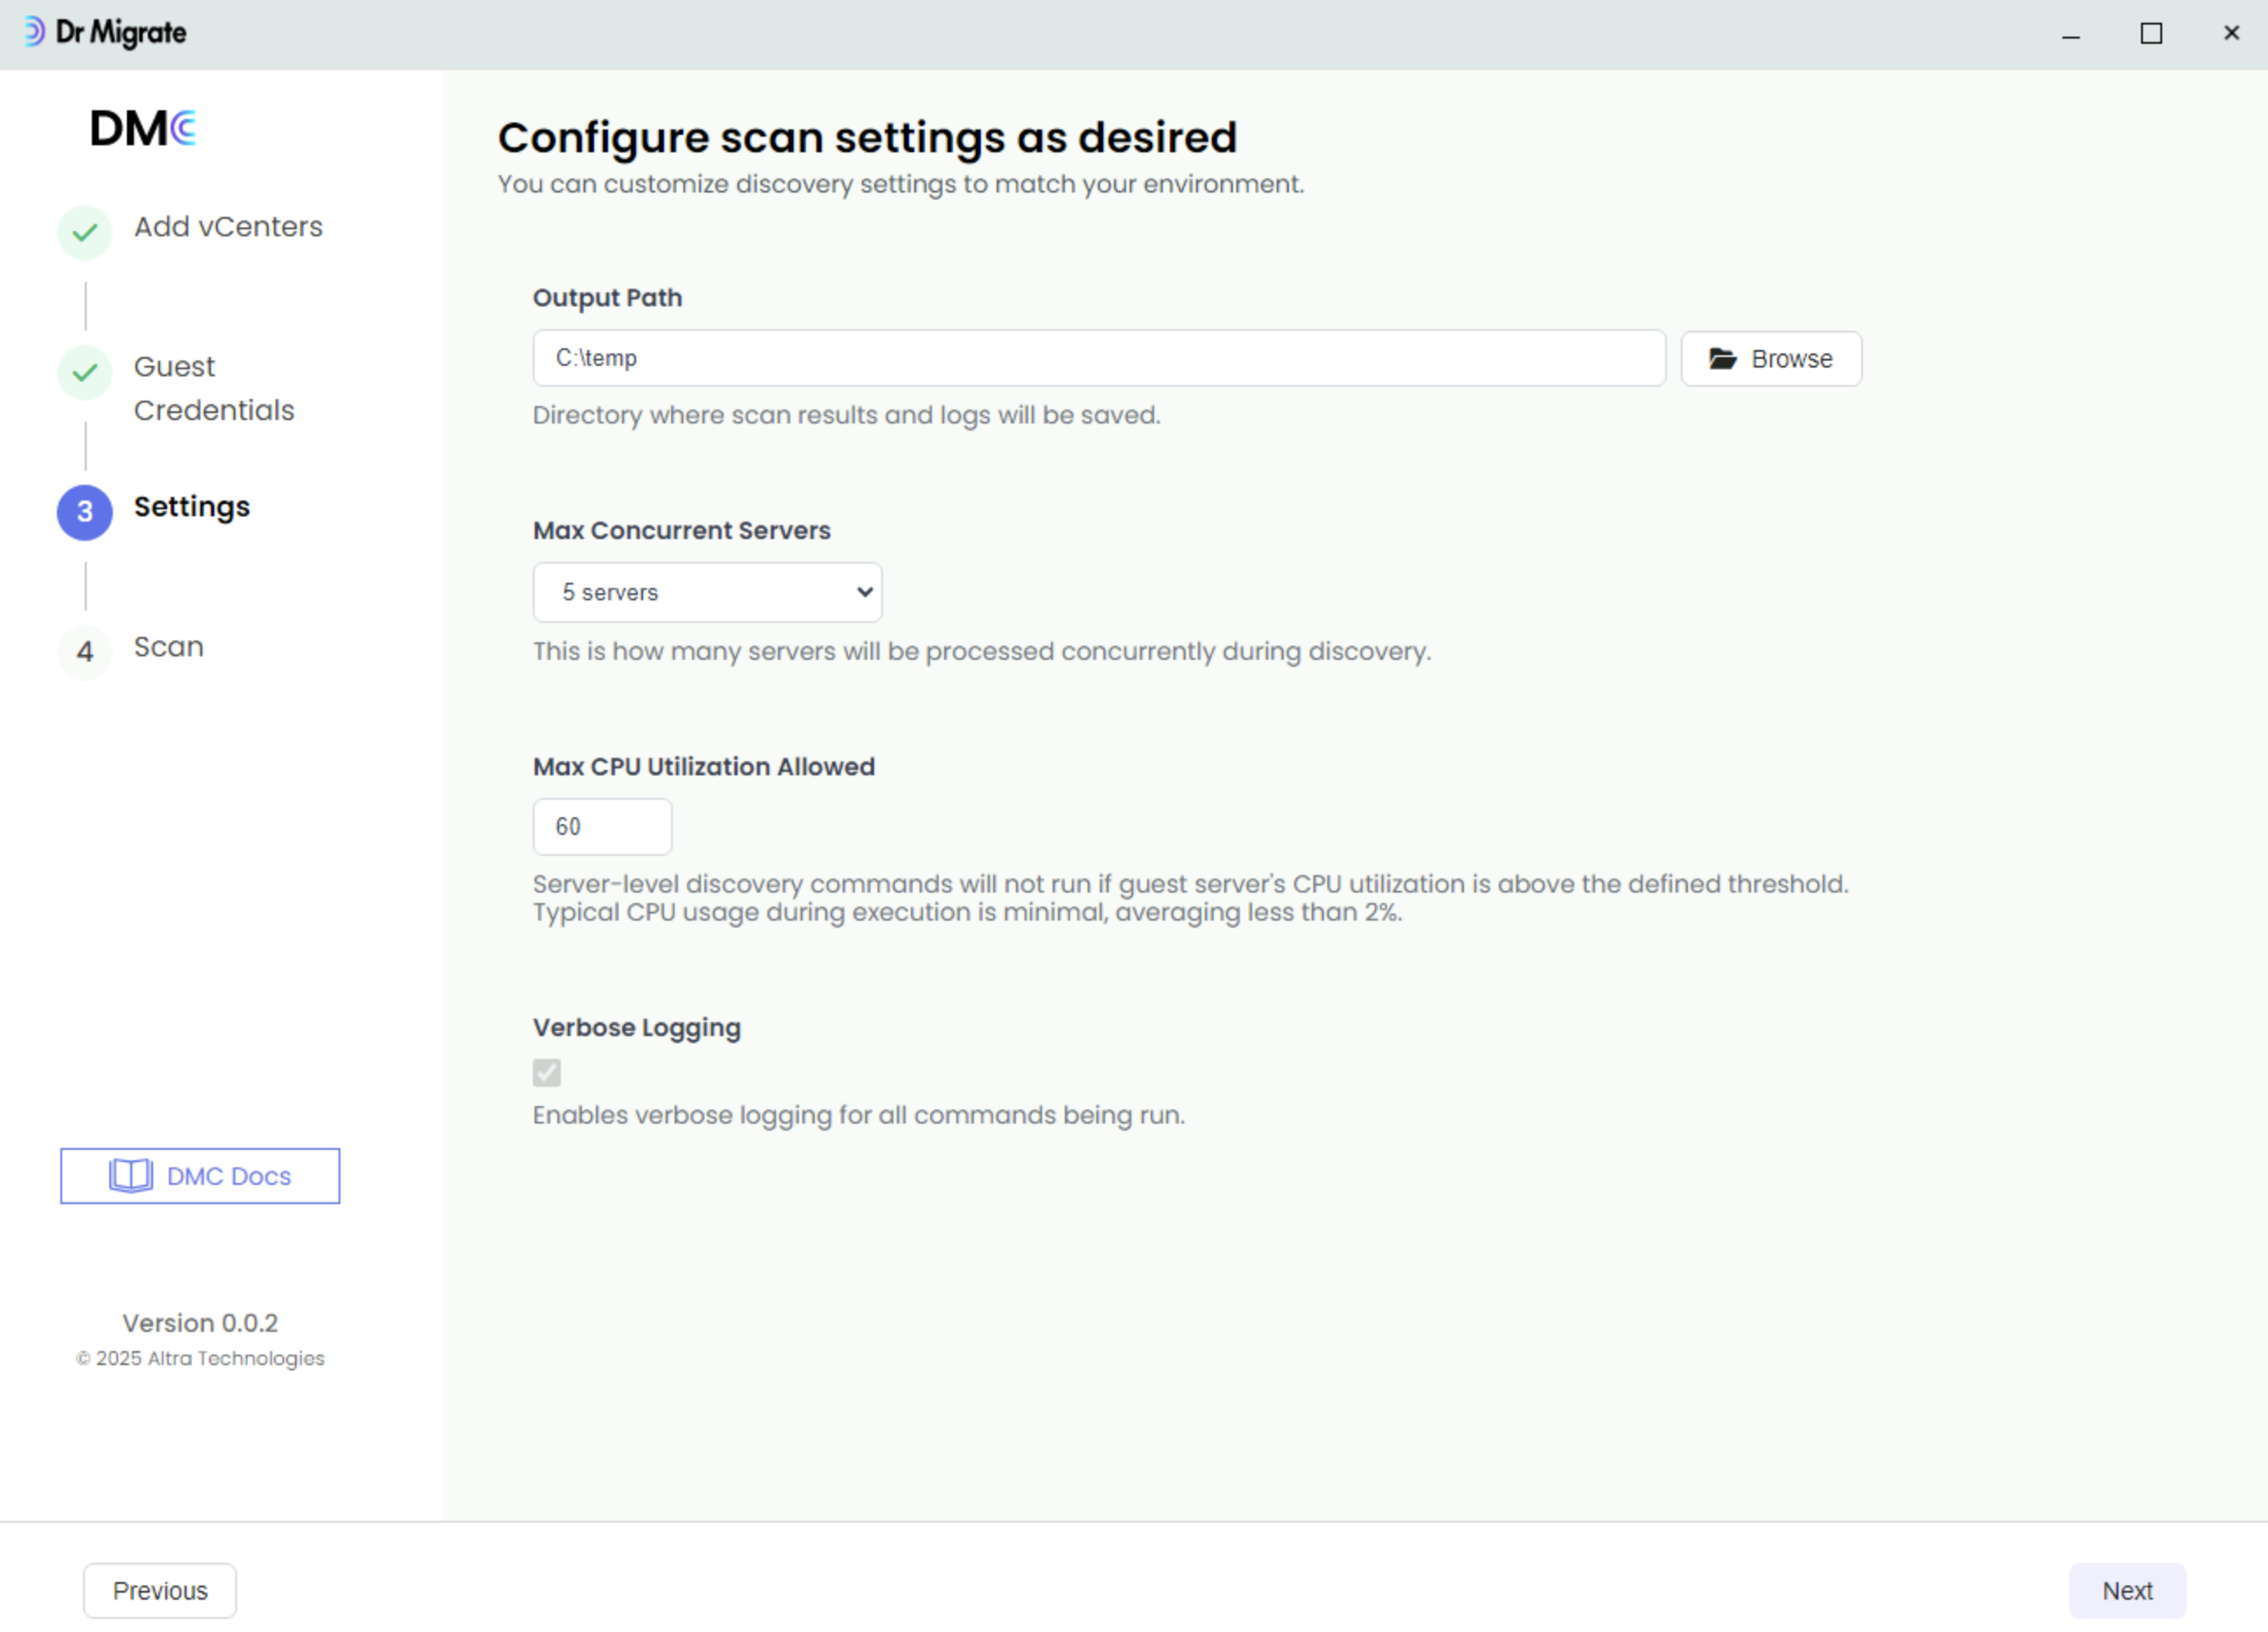
Continue to Scan
Click Next to proceed to the scan phase.
Scan
Review Servers
Review the servers targeted for scanning. You can click on a vCentre and untick any server that you do not want to include in the scan. This method is useful if you wish to conduct a test scan initially.
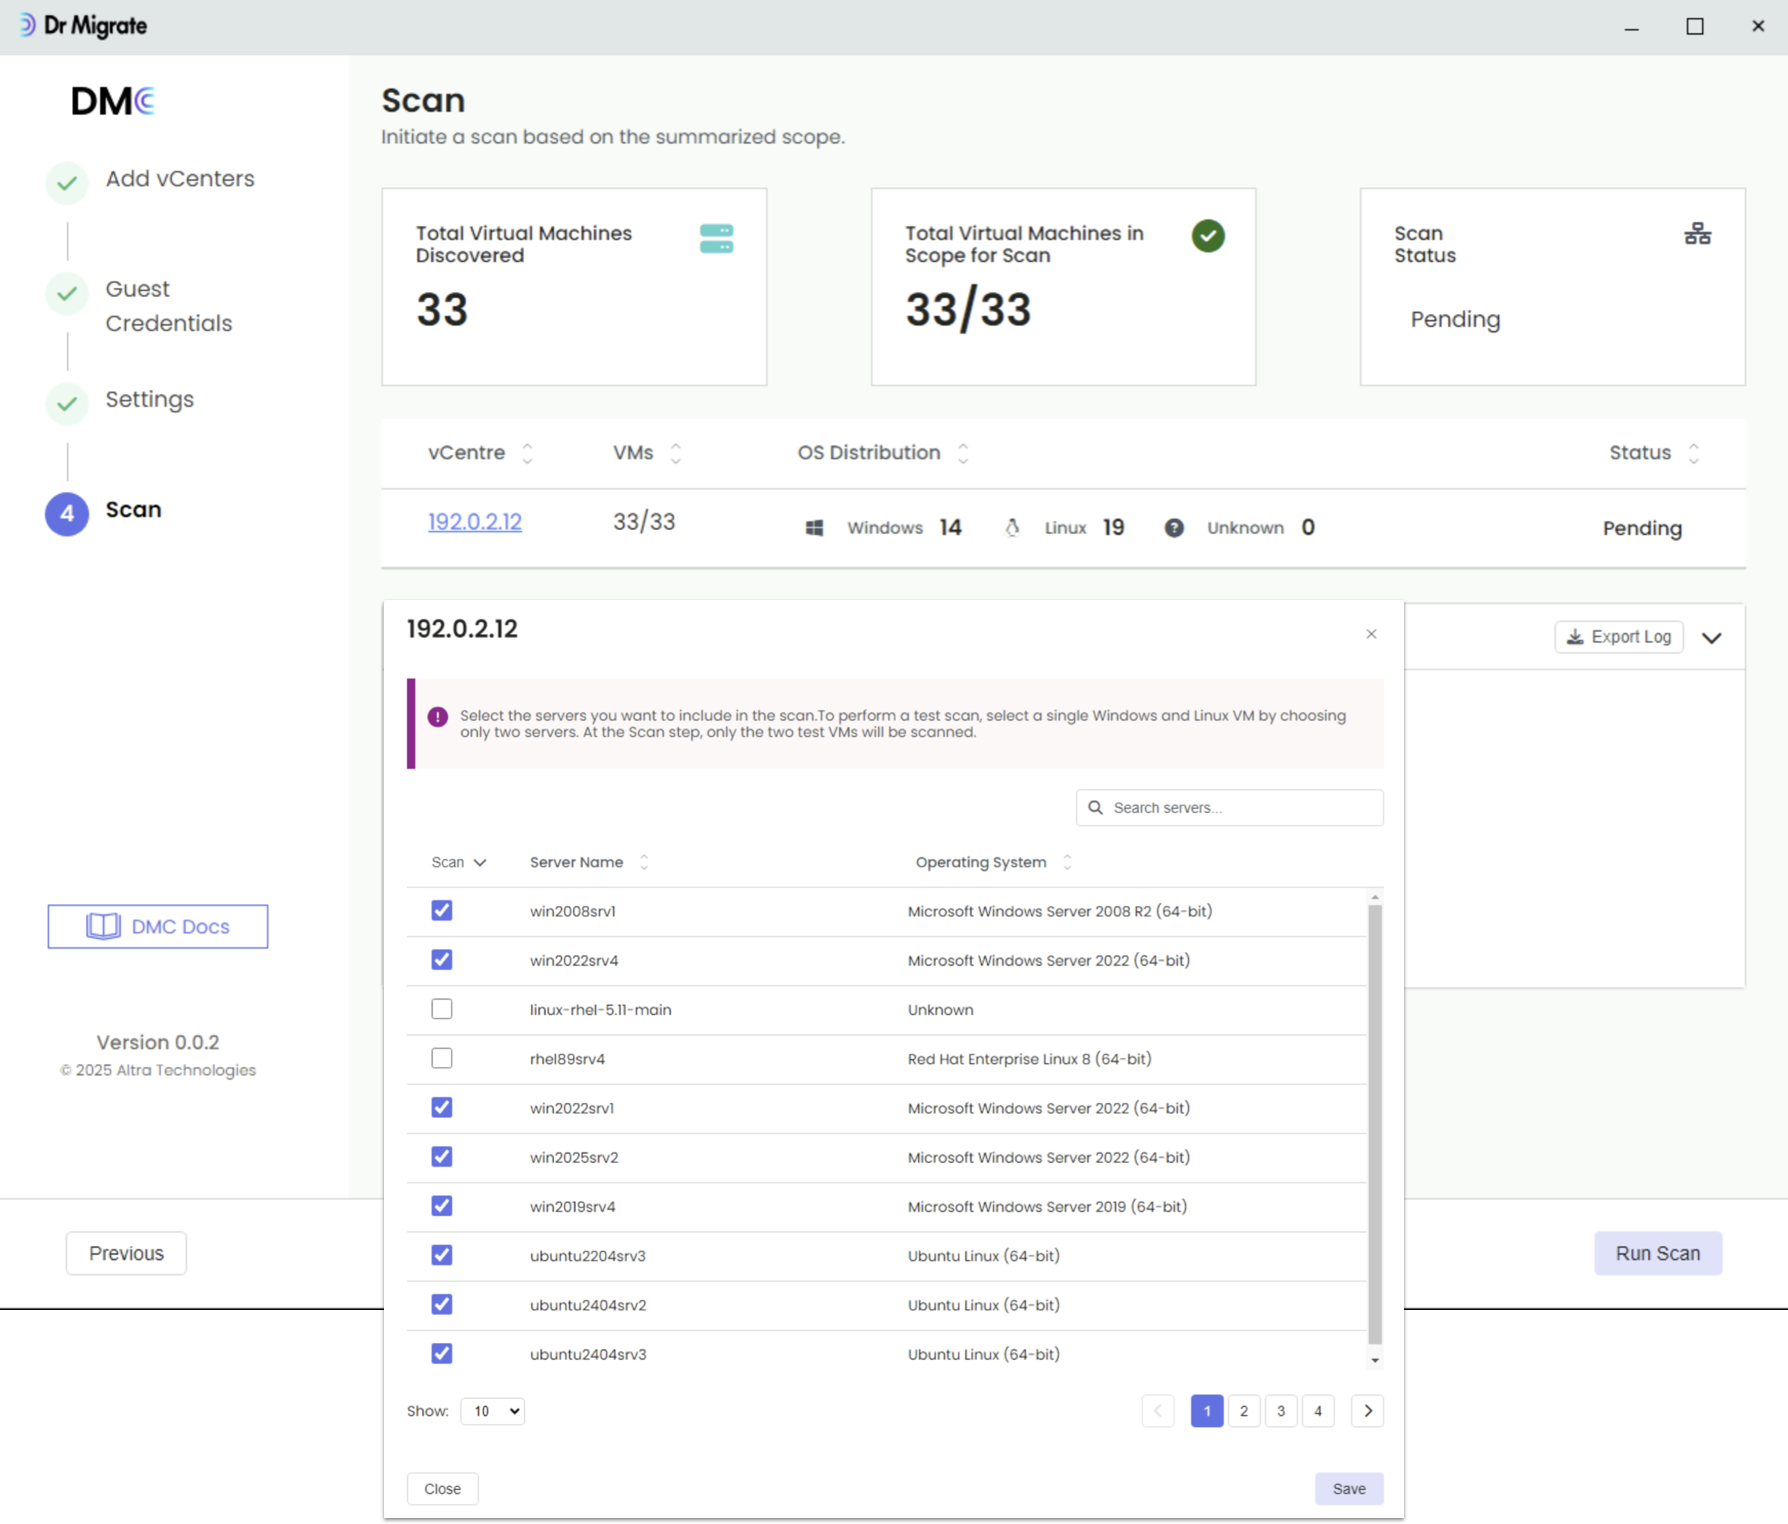
Start Scan
Once you are satisfied with the selected scope, click Run Scan.
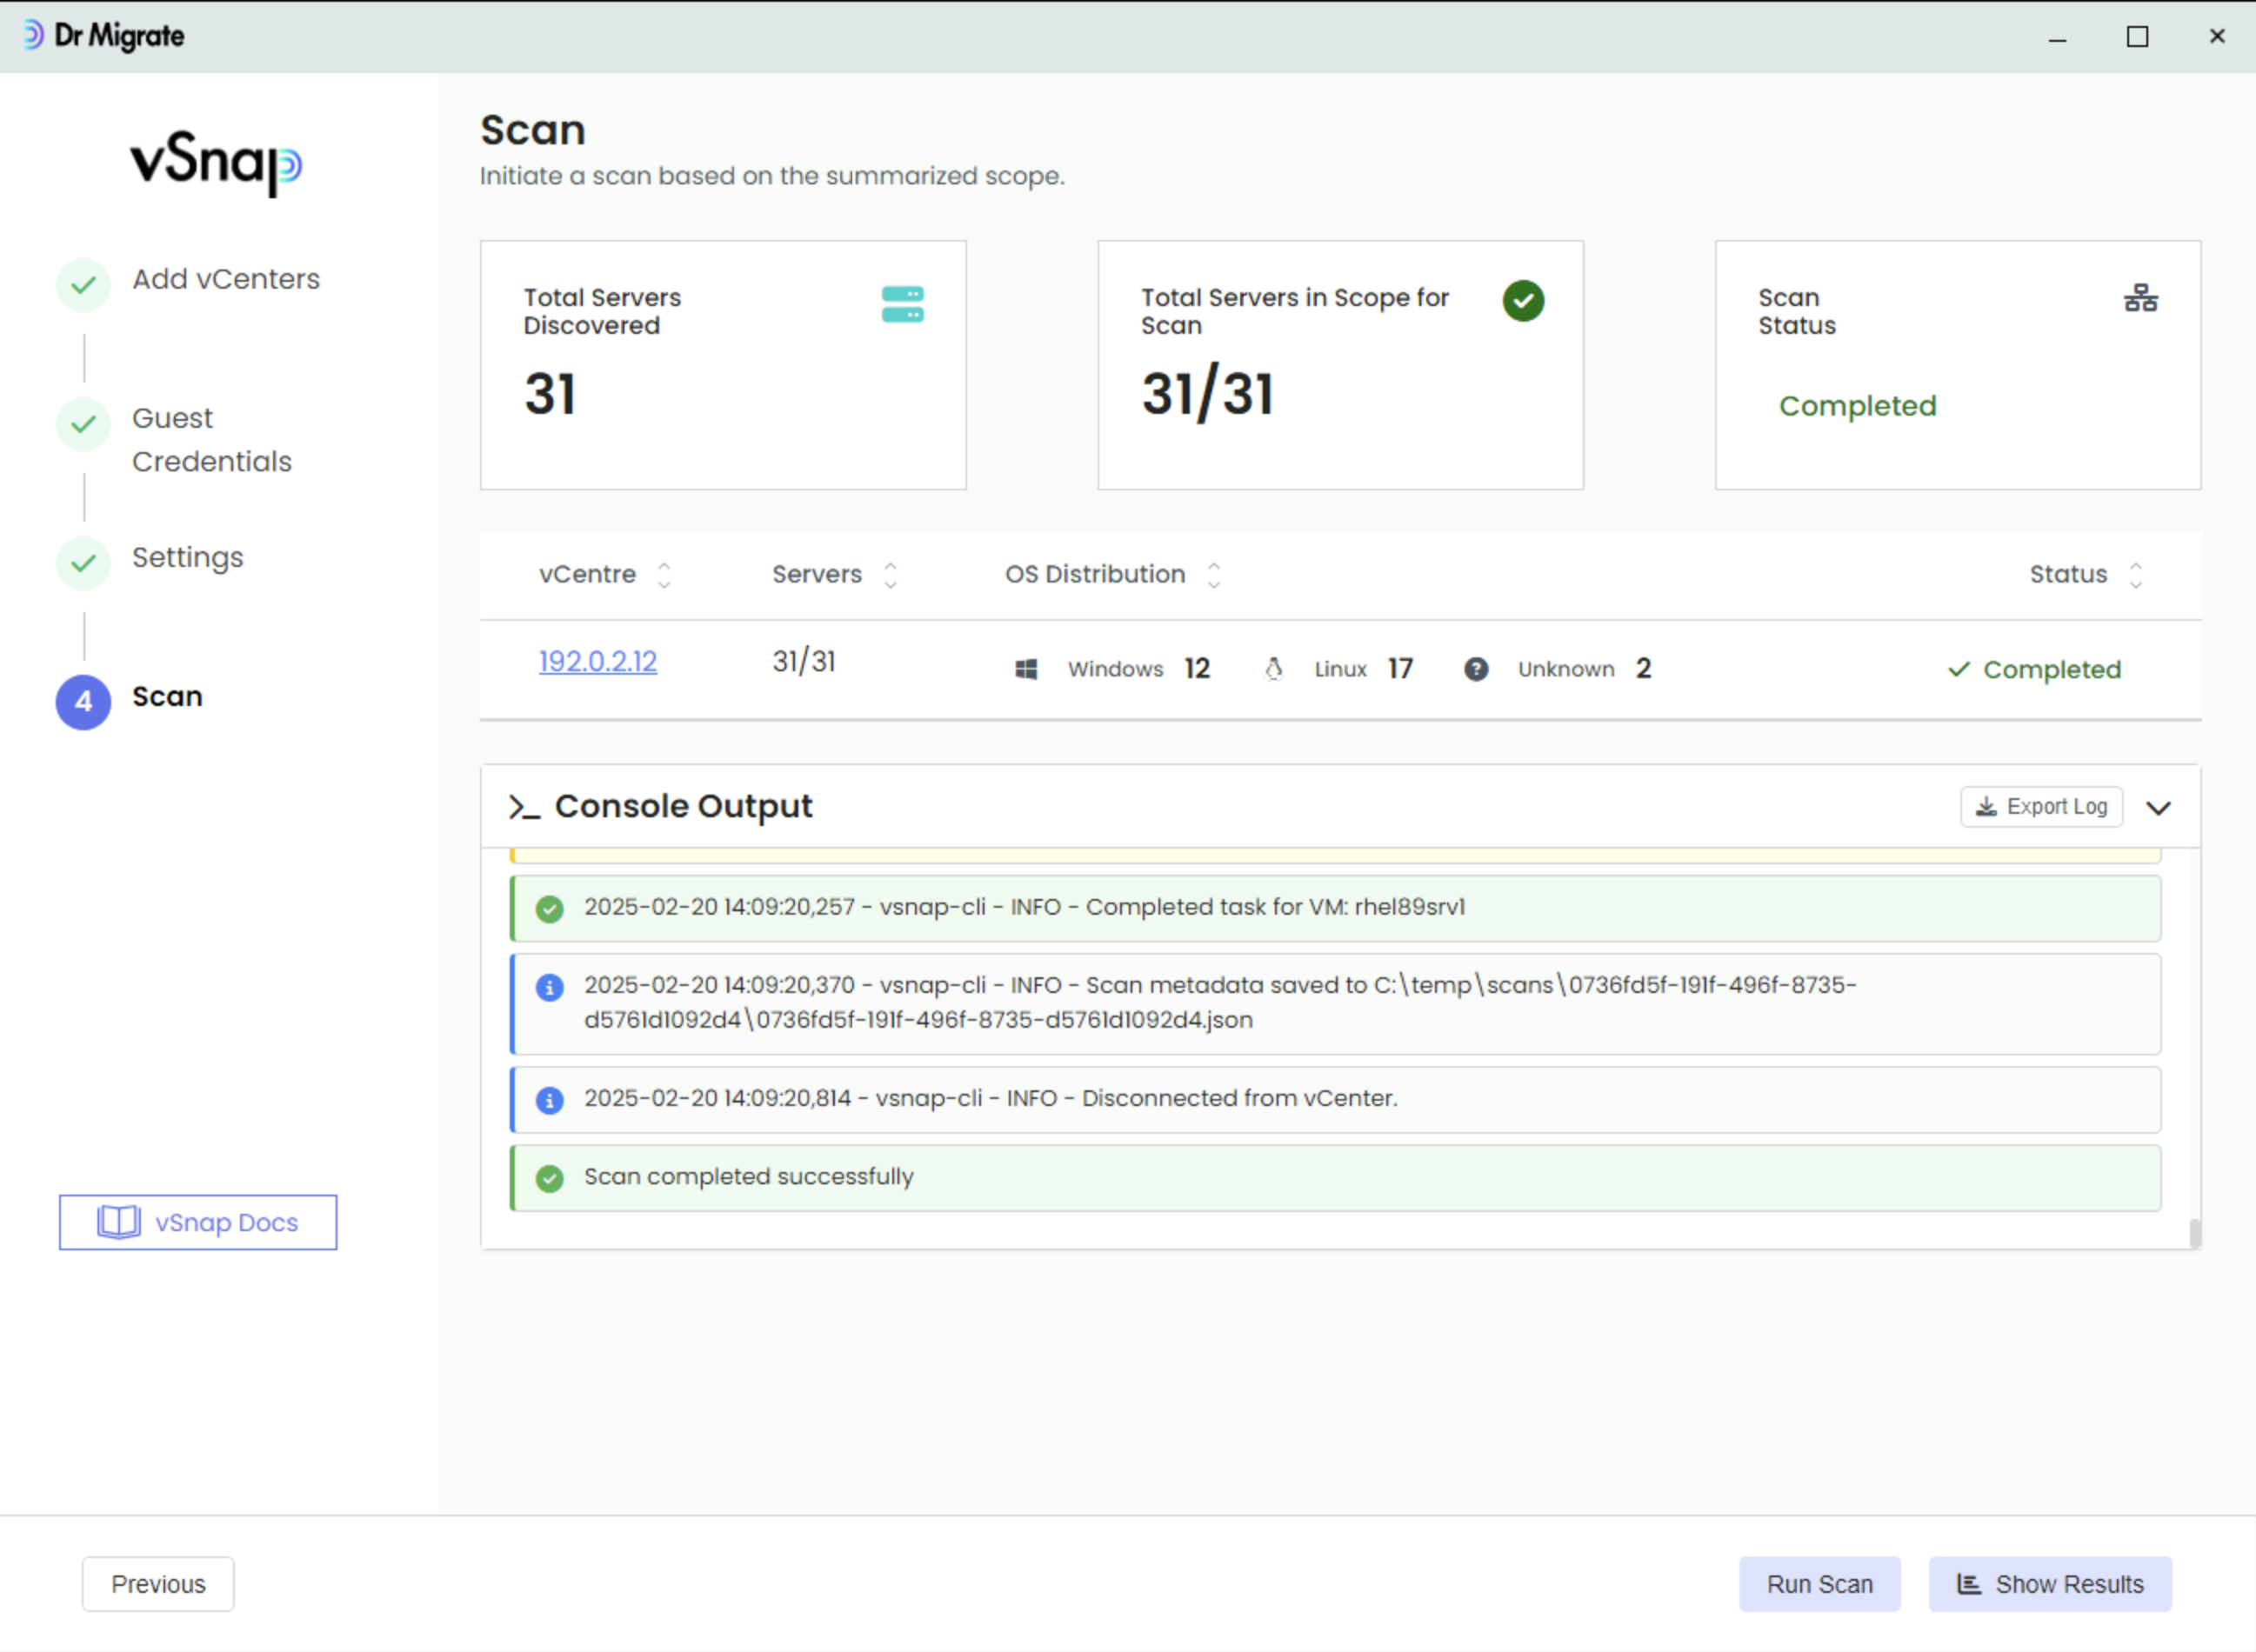
Monitor Progress
The scan’s overall progress will be updated in real time, accompanied by a Console Output that displays detailed logging information.
Save Results
Once the Scan has completed:
Click the Save and Encrypt Scan Results button It is very important that you record the ZIP Password and decryption key. For security reasons, you cannot recover them once DMC closes and will need to rerun the scan.
ZIP Password – encrypts the scan results ZIP (used for unzipping on any machine)
Decryption Key – used in the next step to decrypt the scan results when uploading to Dr Migrate
